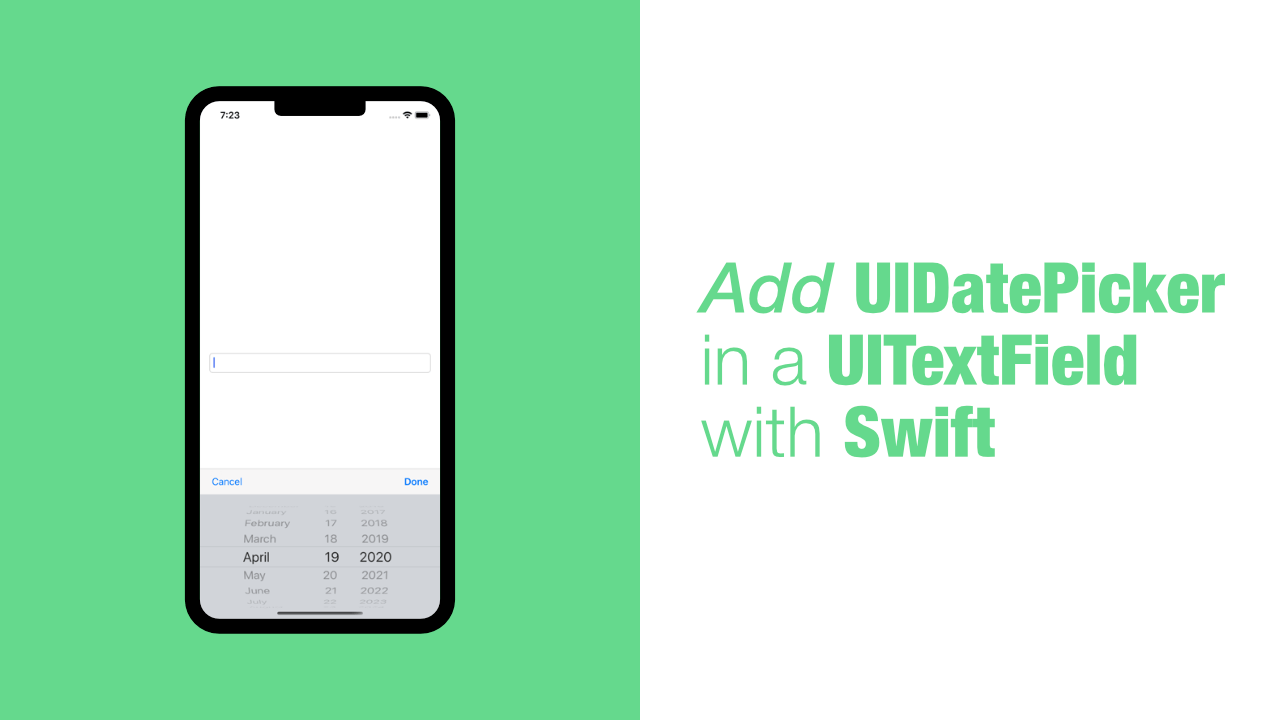
Add UIDatePicker in a UITextField with Swift

In this tutorial I will show you how to add a UIDatePicker to a UITextField. Using a date picker can be a common input in forms when asking a user to sign up or you might be making a timer application and the list goes on. In some cases we might need the date picker to show when we click on a text field, which is what we will be learning in this tutorial.
I was quite surprised by how overly complex is to do. It is not that is is super complex, I was just expecting it to be a lot more simple.
Before we start, this tutorial expects you to have a UITextField in your application. I am going to start with a brand new project, so I will be using the default ViewController.
Step 1: Create UITextField extension
In this tutorial we are going to create an extension on UITextField that will allow us to easily make it show a date picker when we tap on it. So, the first task is to create the extension and add a datePicker method to it.
Add the following extension to your code:
extension UITextField {
    func datePicker<T>(target: T,
                       doneAction: Selector,
                       cancelAction: Selector,
                       datePickerMode: UIDatePicker.Mode = .date) {
        // Code goes here
    }
}
As you can see, this extension has one method, datePicker. It takes four arguments, the first being the target, I have used generics because I think it makes the code more readable compared to using Any. If you want, you can change this to Any.
Next we have the doneAction and cancelAction. Both of these are Selectors that we will pass through as arguments so that we have control over the done and cancel actions.
The last argument is datePickerMode. This will allow us to easily use any date picker mode with our extension. As you can see, this has a default value of .date, so we don't need to pass any value through to it if we are happy to use .date.
Step 2: Creating the ToolBar button items
Before we create the toolbar button item function, let's add the following let to our datePicker method:
let screenWidth = UIScreen.main.bounds.widthWe will use this later on when we create the date picker and the tool bar.
Ok, we can now create our tool bar method. This method is not required because we could create each tool bar item individually, but I prefer putting this in a function as it groups the logic into one place and if you need it somewhere else, it would be possible to move it out to its own class/struct.
One more thing before we add this method. We are going to be using the UIBarButtonItem init which takes barButtonSystemItem as an argument. This lets us use the UIBarButtonItem.SystemItem enum as our type which makes things a bit easier out of the box. This will also be our only argument for the helper method we are going to create now.
Add the following function inside the datePicker method:
func buttonItem(withSystemItemStyle style: UIBarButtonItem.SystemItem) -> UIBarButtonItem {
    let buttonTarget = style == .flexibleSpace ? nil : target
    let action: Selector? = {
        switch style {
        case .cancel:
            return cancelAction
        case .done:
            return doneAction
        default:
            return nil
        }
    }()

    let barButtonItem = UIBarButtonItem(barButtonSystemItem: style,
                                        target: buttonTarget,
                                        action: action)

    return barButtonItem
}
As you can see, we have one argument which is the system bar button item that we want to use. We are going to be using the following three, .cancel, .done and .flexibleSpace.
The first let is for our target. When using .cancel or .done we need to use the target value that will get passed through to datePicker. If we are using .flexibleSpace we can set the target to nil because .flexibleSpace is used for spacing out the bar button items.
Next, we are looking at the action for the bar button item. The action will be the selector that we will call when either the .cancel or .done bar button items get tapped, .flexibleSpace does not need an action. To set the action we are using a self executing closure that has a switch inside. The switch will return the correct action for the style that we are going to use.
Now that we have the buttonTarget and the action we can create a new instance of UIBarButtonItem. The UIBarButtonItem initialiser requires us to pass through the style, buttonTarget and action. Once this this has been initialised, we return it.
Step 3: Setting up the UIDatePicker and the UIToolBar
We have all of our helper code written for the datePicker method. We can now create the UIToolBar and the UIDatePicker. We will start by creating the date picker.
To add the date picker, add the following code to the datePicker method below the buttonItem function:
let datePicker = UIDatePicker(frame: CGRect(x: 0,
                                            y: 0,
                                            width: screenWidth,
                                            height: 216))
datePicker.datePickerMode = datePickerMode
self.inputView = datePicker
We initialise a UIDatePicker with a CGRect for the frame. The height is set to 216, a bit of a strange number, but from my research it seems that that is a normal height for the UIDatePicker.
Once the date picker has be initialised, we set the datePickerMode. This is the reason that the datePicker method has datePickerMode as an argument. We will use that value here.
After that, we set the inputView to our date picker. This will have the date picker get shown when we tap on the UITextField.
Now that we have the date picker done, we can move onto the tool bar. The tool bar is needed for the cancel and done buttons.
Add the following code below the date picker code we just added:
let toolBar = UIToolbar(frame: CGRect(x: 0,
                                      y: 0,
                                      width: screenWidth,
                                      height: 44))
toolBar.setItems([buttonItem(withSystemItemStyle: .cancel),
                  buttonItem(withSystemItemStyle: .flexibleSpace),
                  buttonItem(withSystemItemStyle: .done)],
                 animated: true)
self.inputAccessoryView = toolBar
In the above code we initialise a UIToolBar with a CGRect for the frame. After that, we set the tool bar items that we want to use. This is where we use the buttonItem function that we created earlier. This is also where we can see how clean this looks as well as it being more readable.
Lastly we assign the toolBar to the inputAccessoryView. This will make the toolbar show up above the date picker.
Unfortunately we cannot test this out because we are not calling the datePicker method.
Step 4: Use the datePicker method
Most of the work is done now but we still need to create two selectors so that we can pass them through to our datePicker method.
Let's add those now. I have added the following methods to my ViewController:
@objc
func cancelAction() {
    self.textField.resignFirstResponder()
}

@objc
func doneAction() {
    if let datePickerView = self.textField.inputView as? UIDatePicker {
        let dateFormatter = DateFormatter()
        dateFormatter.dateFormat = "yyyy-MM-dd"
        let dateString = dateFormatter.string(from: datePickerView.date)
        self.textField.text = dateString

        self.textField.resignFirstResponder()
    }
}
As you can see, we have two methods. One for the cancel action and one for the done action.
The cancelAction will resign first responder while the doneAction does a little bit more. In the doneAction we cast the inputView of the text field as a UIDatePicker. If this does not return nil we create a new DateFormatter, we set the date format that we want, in this case it is yyyy-MM-dd. We then use the date formatter to return a date in the format we want and as a string. Once we have the string, we can set the text field text property.
Lastly, we will resign first responder in the doneAction. If the user has clicked the done button it means that they have selected a date and therefore we do not need to have the date picker open anymore. If they want to edit the value, they can tap on the text field again.
Now that we have the two methods created that we will be using for the cancel and done selectors, let's call the datePicker method.
In my viewDidLoad I have added the following:
self.textField.datePicker(target: self,
                          doneAction: #selector(doneAction),
                          cancelAction: #selector(cancelAction),
                          datePickerMode: .date)
As you can see, we are passing self through as our target, we then pass the two methods we just created as our selectors, and lastly I have set the datePickerMode as .date which in this case has no point, but I wanted to show all the possible arguments being used.
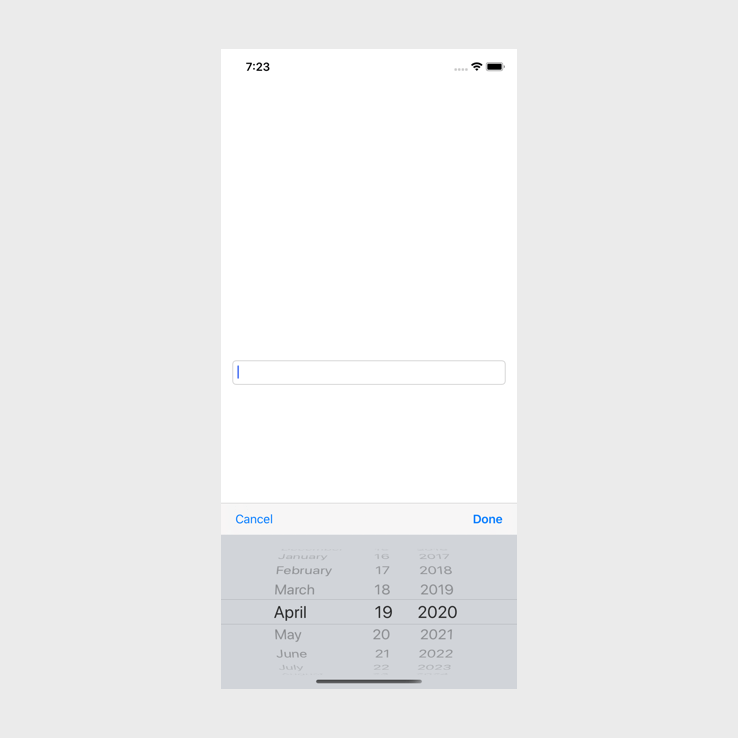
If you build and run the app now, you should see the following once you tap on the text field:
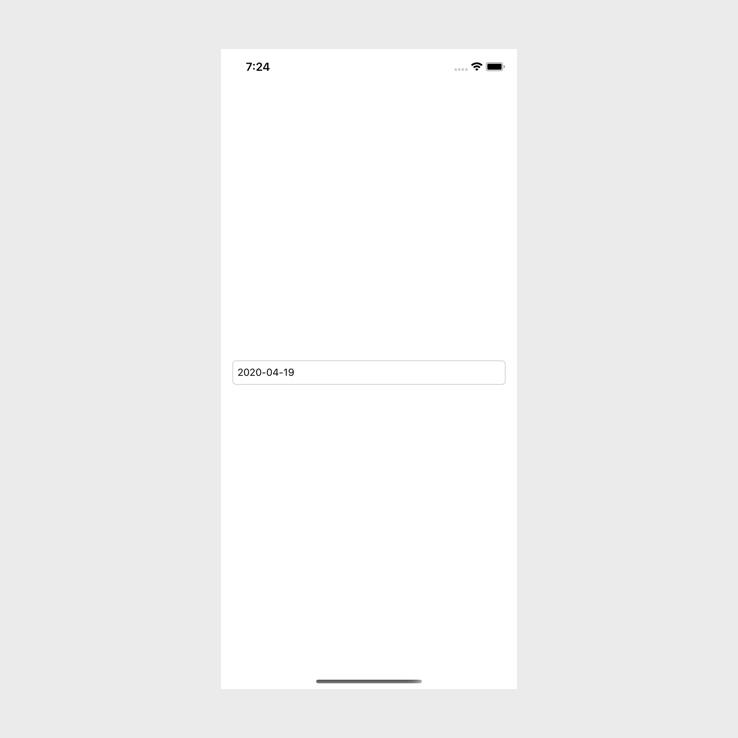
If you click cancel, the date picker will disappear, if you click done you will have the following:
Conclusion
Adding a date picker to a text field is a bit more work than expected and I feel that Apple should maybe provide this as a default option. However, once you get started, the code is not complicated which is great news because sometimes these simple tasks can get out of control.
If you want the full source code of the above project, you can find it here.