Create a Custom UITableViewCell with Swift

UITableViews are one of the most commonly used views in iOS development. It is often the case that one will want to create a custom UITableViewCell, so in this tutorial I will show you how to create custom UITableViewCells.
Before we start this tutorial, I will assume that you will already have a UITableView setup, I don't have one fully setup as we are going to be using a custom cell, but I will have the basics of a tableview setup. If you don't have a tableview setup, you can find the current project here to see what I done.
Let's get started:
Step 1: Create a new Cocoa Touch Class
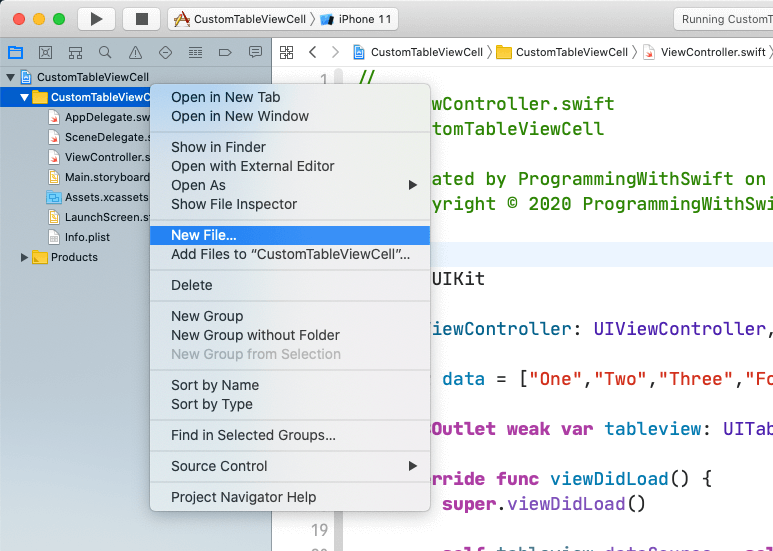
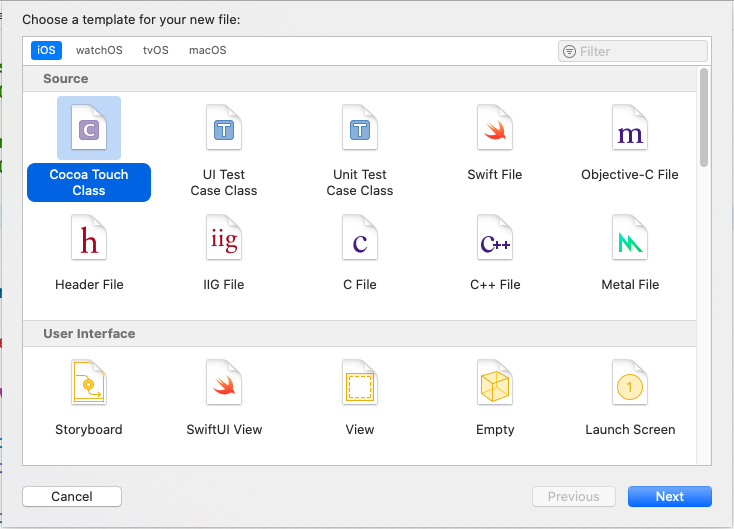
After clicking on New File... you need to select the Cocoa Touch Class template for the new file as seen below:
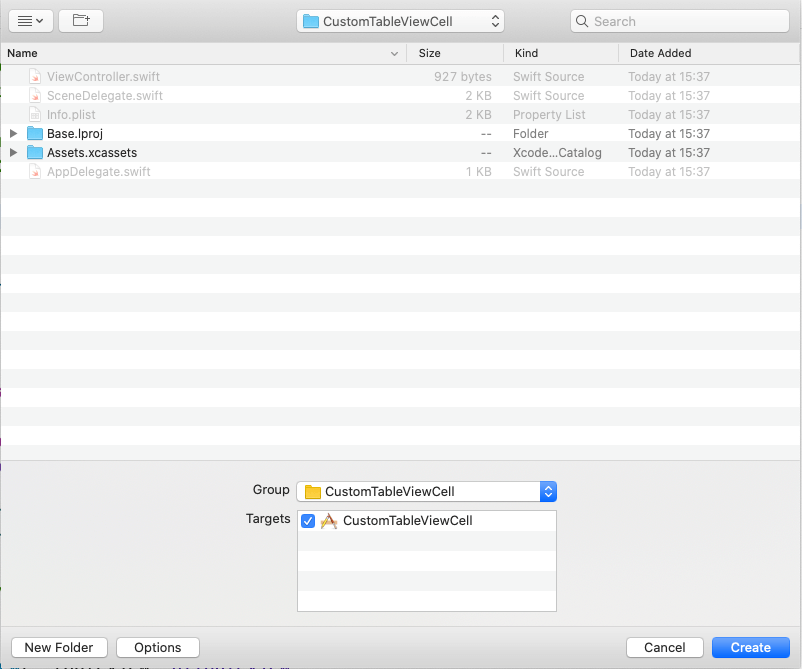
Next we need to give our new file a name. Because this is a Cocoa Touch Class we need to tell it what the subclass is. Since we are creating a custom UITableViewCell, our subclass will be of type UITableViewCell. Once you have selected the subclass make sure to check the box next to the label that says Also create XIB file. Once you have done this, you can click next. Below is an image of what this looks like:

After that we just need to save the file. I am going to save it to the default location that Xcode has provided. Make sure that that the correct targets have been selected.
Step 2: Designing the Cell
For the cell design I am going to set the height to 60 and then add a UITextField and a UIButton. We will hook these up later to the CustomTableViewCell class.
Set set the height to 60, see below image:
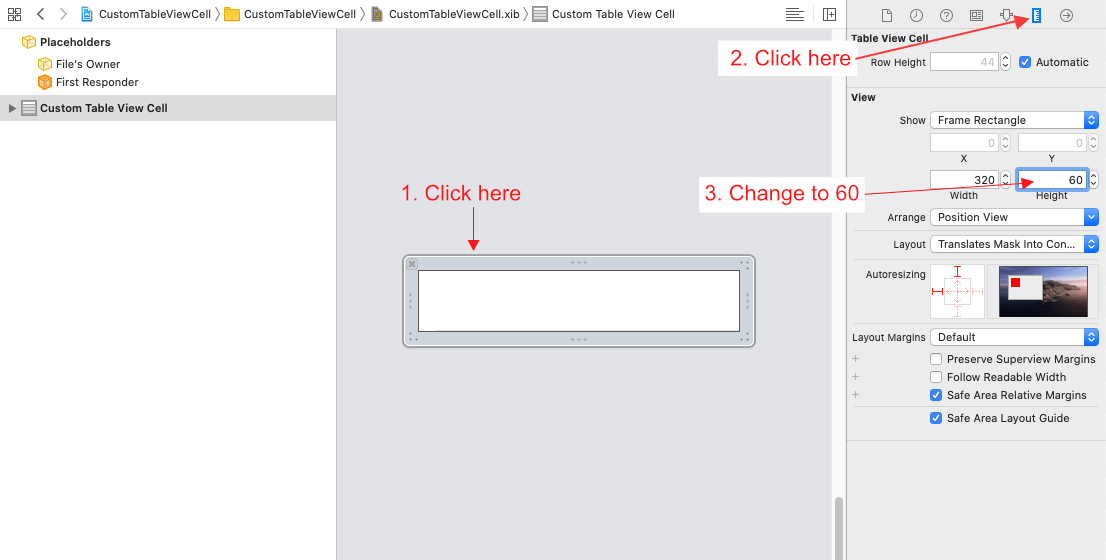
To do this, click on the view in the middle and then click on the Size inspector, which is the icon in the top that is highlighted in the image.
You should now be able to see a height value under the View section. Change the height value to 60.
Add the UITextField and UIButton to the view
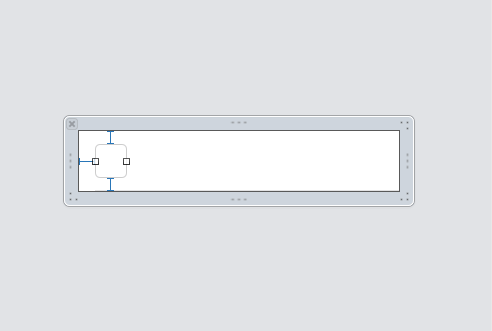
Now that we have updated the size of our view, we can add a UITextField and a UIButton to our view.
Let's add our UITextField first. I have set the top and bottom constraints to 13 and the leading constraint to 16. With these constraints it should look similar to the below image. We will fix this when we add our button.
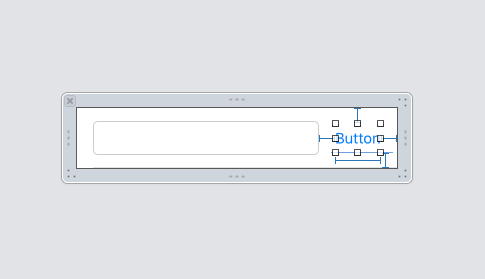
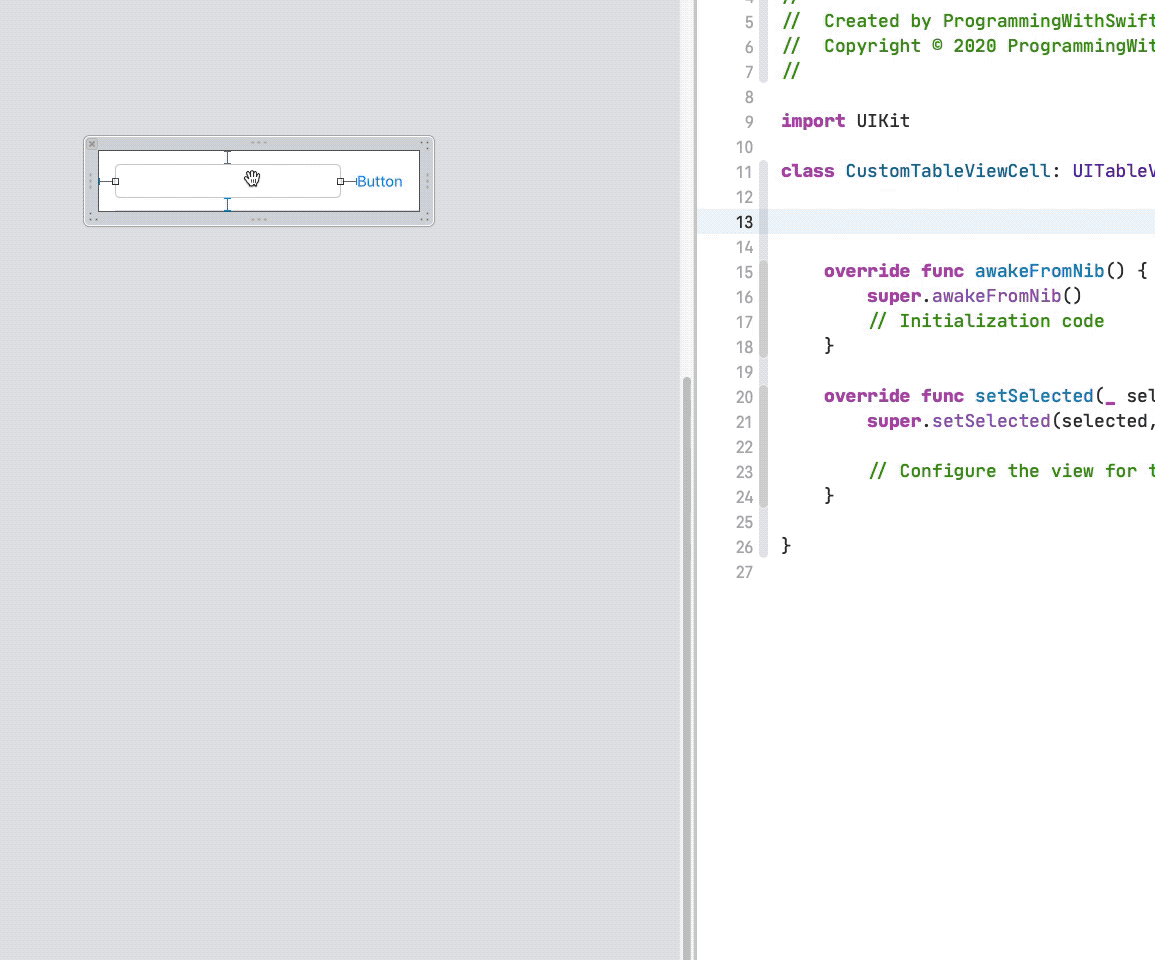
Now, we can add our button on the right. For the button, I will add a leading constraint which will be a constraint for the space between the button and the textfield, this constraint will have a value of 16. My trailing value with also have a value of 16 and the top and bottom constraints will have a value of 15. I will also set the button width to 46.
Once you have done this, your view should look like this:
Step 3: Registering the new custom UITableViewCell with the UITableView
Now that we have the completed our cell styling, we can register our custom cell with our tableview.
To do this we need to create a new method in our ViewController called registerTableViewCells. The code will look like this:
private func registerTableViewCells() {
    let textFieldCell = UINib(nibName: "CustomTableViewCell",
                              bundle: nil)
    self.tableview.register(textFieldCell,
                            forCellReuseIdentifier: "CustomTableViewCell")
}
In the first line we create a new instance of UINib, the first argument is nibName. This needs to be the name of your new cell that you created, the file name.
In the second line we tell the UITableView what new custom cell we want to register with it, we need to pass through the UINib instance that we created in the line before and then we need to provide a reuse identifier for the new cell. I just used the file name as the reuse identifier in this case but you can give it any name you want.
Step 4: Calling the registerTableViewCells method
I will call the registerTableViewCells method from the viewDidLoad method.
My viewDidLoad looks like this:
override func viewDidLoad() {
    super.viewDidLoad()

    self.tableview.dataSource = self
    self.tableview.delegate = self

    self.registerTableViewCells()
}
Step 5: Updating the CellForRowAtIndexPath function
In order to use the custom cell we need to update the cellForRow method by updating it to look like the following:
func tableView(_ tableView: UITableView,
               cellForRowAt indexPath: IndexPath) -> UITableViewCell {
    if let cell = tableView.dequeueReusableCell(withIdentifier: "CustomTableViewCell") as? CustomTableViewCell {
        return cell
    }

    return UITableViewCell()
}
If you used a different Identifier when you registered the cell then you will need to pass that value through for the withIdentifier argument.
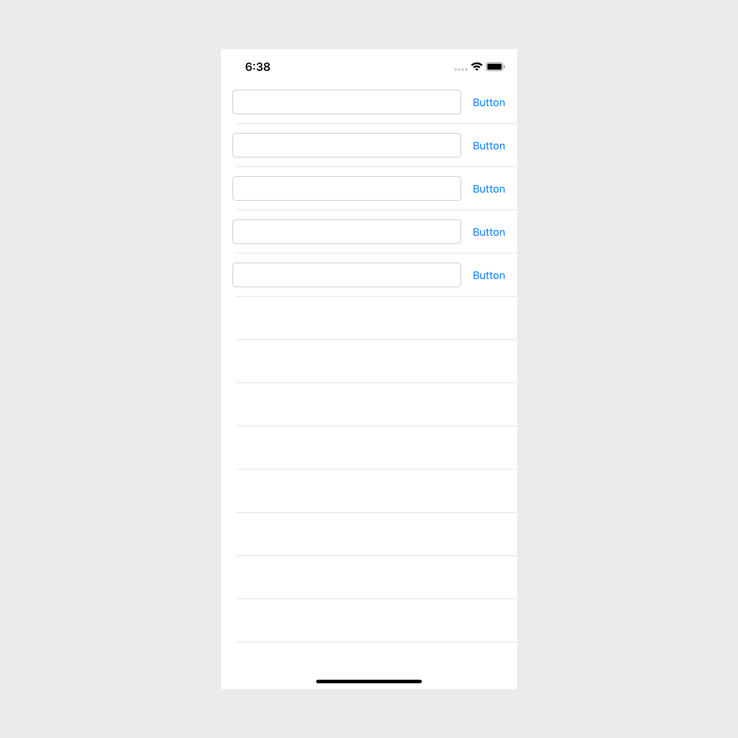
That is it! If we build and run the app we should see the custom tableview cell in the tableview:
Now we just need to hook up the UITextField and the UIButton on the new cell. All we are going to when we hook these up is to print the text that you type in the textfield
Step 6: Creating the outlets and function for UITextField and UIButton
In this step we will create the outlet/action. To do this we need to open our CustomTableViewCell.xib and open our CustomTableViewCell.swift.
I have created an outlet for my textfield called textfield and I have created an action for the button called buttonAction. My code looks like this:
@IBOutlet weak var textfield: UITextField!

@IBAction func buttonAction(_ sender: Any) {
    if let text = self.textfield.text {
        print(text)
    }
}
You should now be able to run the project. When you run it, you should have a custom UITableViewCell showing. You should also be able to type something into a textfield and when you tap on the button it should print whatever text you typed into the textfield in the console in Xcode
You can find the full source code here.