Create a Slide out Menu with SwiftUI
Learn how to create a side menu using SwiftUI. I will show you how easy it is to create a side menu using SwiftUI.

In todays tutorial we will learn how to create a side menu using SwiftUI. I have never created a side menu with UIKit, so I thought it would be fun to create one with SwiftUI. It turned out to be easier than I thought it would be, so lets get's started.
What are we building?
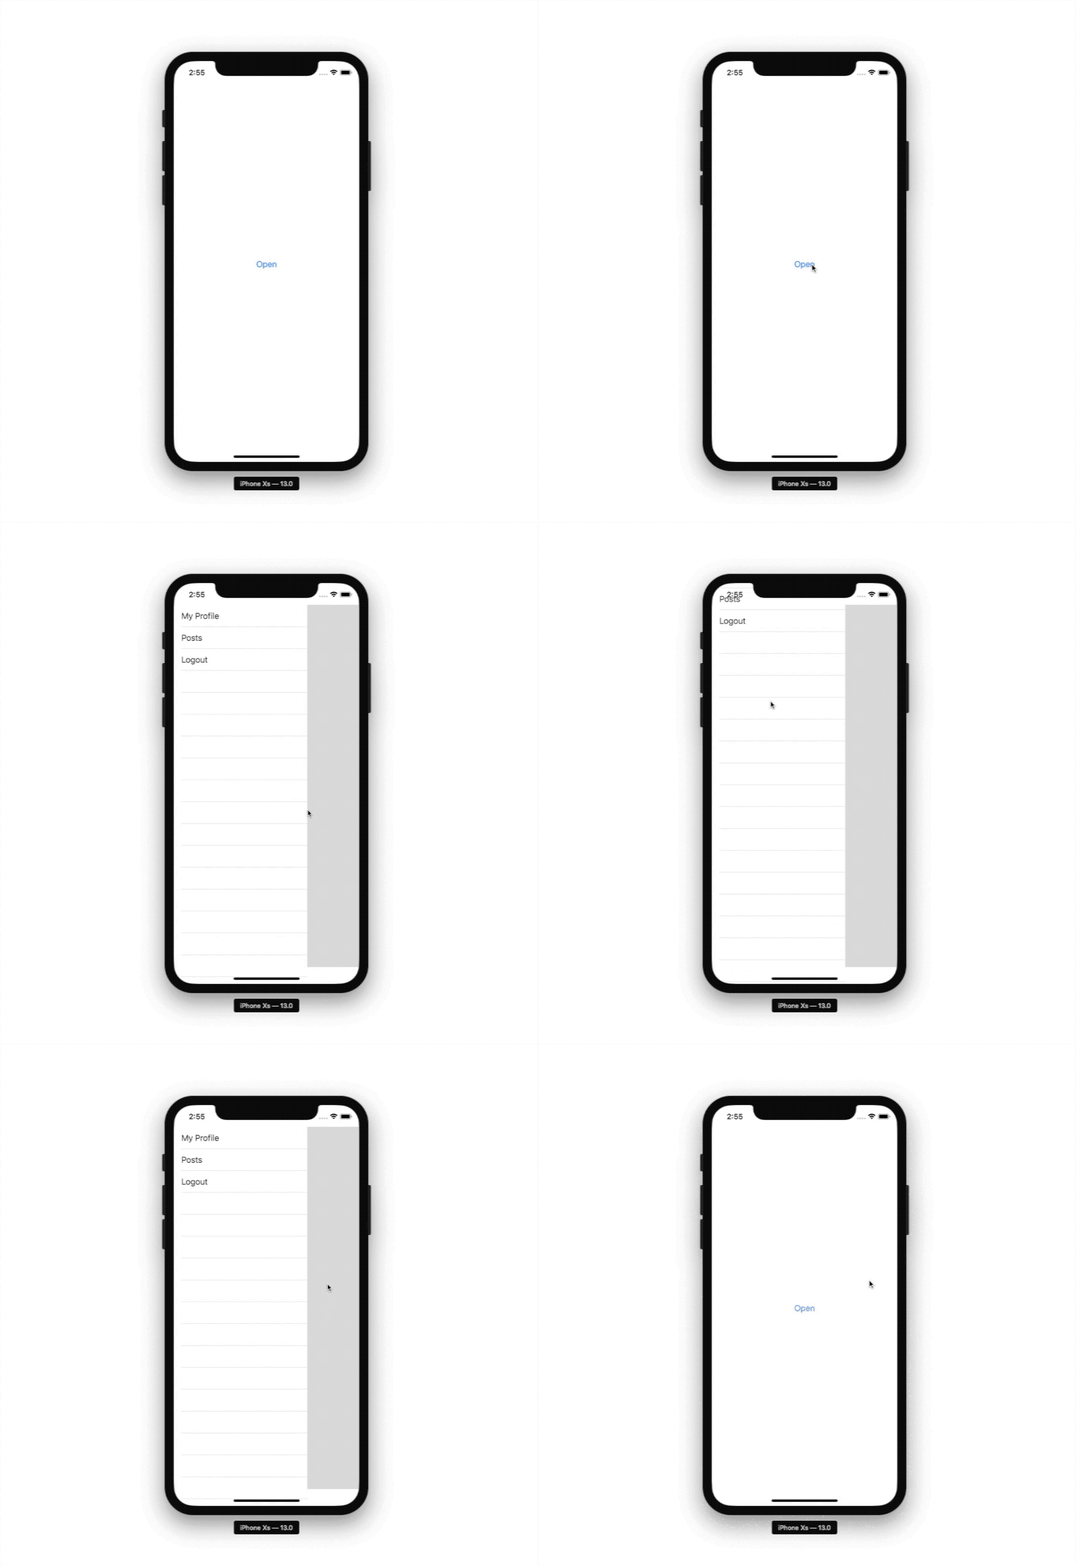
We are going to build a simple side menu. When you click on the open button the menu will slide open and the background will animate in. If you tap on the background the menu slide closed and the background will fade away.

Step 1: Create the menu content
For this we will create a list with three Text views. Each Text view will have a TapGesture so that we can test that it is working.
struct MenuContent: View {
    var body: some View {
        List {
            Text("My Profile").onTapGesture {
                print("My Profile")
            }
            Text("Posts").onTapGesture {
                print("Posts")
            }
            Text("Logout").onTapGesture {
                print("Logout")
            }
        }
    }
}
There is nothing much to the menu content. I just added it so that there can be something to see.
Step 2: Create the side menu
This is the most difficult step of the tutorial, but it is still relatively simple.
We need to create a new SideMenu view. This view will have three properties, width, isOpen, menuClose.
struct SideMenu: View {
    let width: CGFloat
    let isOpen: Bool
    let menuClose: () -> Void

    var body: some View {
        // Code here
    }
}
menuClose is a function that we will pass through. That way we can keep the open state local to the ContentView view. I am doing it like this because this is a simple application, there are better ways to solve this if this was a real world application.
Create the background view
Before we get to the background view, let's add a ZStack to our body. This will allow us to add a the menu above the background.
Update your SideMenu to look like this:
struct SideMenu: View {
    let width: CGFloat
    let isOpen: Bool
    let menuClose: () -> Void

    var body: some View {
        ZStack {
       	    // Code here
        }
    }
}
Ok, now we can add the background view. For this view I used a GeometryReader and an EmptyView. I thought that this will be the best way to create this as I did not want another stack, even with another stack it would require a view, in this case an EmptyView.
This background view will have a background color which will have an opacity level, but the view itself will also have an opacity level. I wanted to try and animate the opacity of the background color but that didn't work, so I needed to give the GeometryReader an opacity and animate that.
We will also add a TapGesture to this view so that when the user taps on it, the menu will slide away. This is where we will call the menuClose method that we passed through.
Add the following code inside the ZStack:
GeometryReader { _ in
    EmptyView()
}
.background(Color.gray.opacity(0.3))
.opacity(self.isOpen ? 1.0 : 0.0)
.animation(Animation.easeIn.delay(0.25))
.onTapGesture {
    self.menuClose()
}
Later on you will see how the self.isOpen works. But basically I have a State property in the ContentView which will get toggled when we call the menuClose method.
Add the menu content view
We are going to add an HStack and in that HStack we will use the MenuContent view we created in step 1. Will also use a Spacer so that the menu is on the left hand side.
Add the following code below the GeometryReader:
HStack {
    MenuContent()
        .frame(width: self.width)
        .background(Color.white)
        .offset(x: self.isOpen ? 0 : -self.width)
        .animation(.default)

    Spacer()
}
As you can see, we set the frame and background of the MenuContent. The next thing that we do is set the offset of x. If the menu is closed we set it to -self.width so that it is off the screen. When self.isOpen changes we set the offset to 0. After that we add a default animation. By adding this line of code it will animate the offset change.
Step 3: Adding the menu and the open button to the ContentView
We can now add the SideMenu to the ContentView. The ContentView has one property, menuOpen, which will track whether or not the menu is open. Based on this we show the Button that opens the menu.
We also need a method to pass to the SideMenu so we will add that in below the body. Update your ContentView to look like this:
struct ContentView: View {
    @State var menuOpen: Bool = false

    var body: some View {
        // Code here
    }

    func openMenu() {
        self.menuOpen.toggle()
    }
}
The reason that we need to create a method to toggle opening and closing the menu is so that we can change the value of menuOpen from the SideMenu view. Since structs are value types, they are immutable, so we would not be able to change the value after the SideMenu has been initialised. But this also allows us to have one source of truth.
Lets add the body content:
ZStack {
    if !self.menuOpen {
        Button(action: {
            self.openMenu()
        }, label: {
            Text("Open")
        })
    }

    SideMenu(width: 270,
             isOpen: self.menuOpen,
             menuClose: self.openMenu)
}
In the body we add or remove the button to the view depending on the value of menuOpen. The buttons' action is to call the openMenu method, and we set the label to "Open".
We also add the SideMenu below. This means that it will be rendered above the button because of the ZStack. We set the menu width, I have used a random value for this, we pass through the menuOpen state via the isOpen argument, lastly we pass through the openMenu method to allow the SideMenu view to toggle whether the SideMenu is open or closed.
You should now be able to build and run the app and it should work as the example at the top of this post shows.
If you found this tutorial helpful, please share with others that might like it too.
Final Code
import SwiftUI

struct MenuContent: View {
    var body: some View {
        List {
            Text("My Profile").onTapGesture {
                print("My Profile")
            }
            Text("Posts").onTapGesture {
                print("Posts")
            }
            Text("Logout").onTapGesture {
                print("Logout")
            }
        }
    }
}

struct SideMenu: View {
    let width: CGFloat
    let isOpen: Bool
    let menuClose: () -> Void

    var body: some View {
        ZStack {
            GeometryReader { _ in
                EmptyView()
            }
            .background(Color.gray.opacity(0.3))
            .opacity(self.isOpen ? 1.0 : 0.0)
            .animation(Animation.easeIn.delay(0.25))
            .onTapGesture {
                self.menuClose()
            }

            HStack {
                MenuContent()
                    .frame(width: self.width)
                    .background(Color.white)
                    .offset(x: self.isOpen ? 0 : -self.width)
                    .animation(.default)

                Spacer()
            }
        }
    }
}

struct ContentView: View {
    @State var menuOpen: Bool = false

    var body: some View {
        ZStack {
            if !self.menuOpen {
                Button(action: {
                    self.openMenu()
                }, label: {
                    Text("Open")
                })
            }

            SideMenu(width: 270,
                     isOpen: self.menuOpen,
                     menuClose: self.openMenu)
        }
    }

    func openMenu() {
        self.menuOpen.toggle()
    }
}