Fix "this class is not key value coding-compliant for the key"

In this tutorial we will learn how to fix "this is not key value coding-compliant for the key". This is a quite a common problem with new developers and the issue occurs when the user interface which is created with Interface Builder and the code do not match up, specifically with regards to IBOutlet's.
What causes this issue?
This is caused by one of the following issues, the Storyboard or the XIB file is expecting to be connected to an IBOutlet and during run time it is not able to find that outlet so it crashes. It could also be due to the Storyboard referencing the incorrect class.
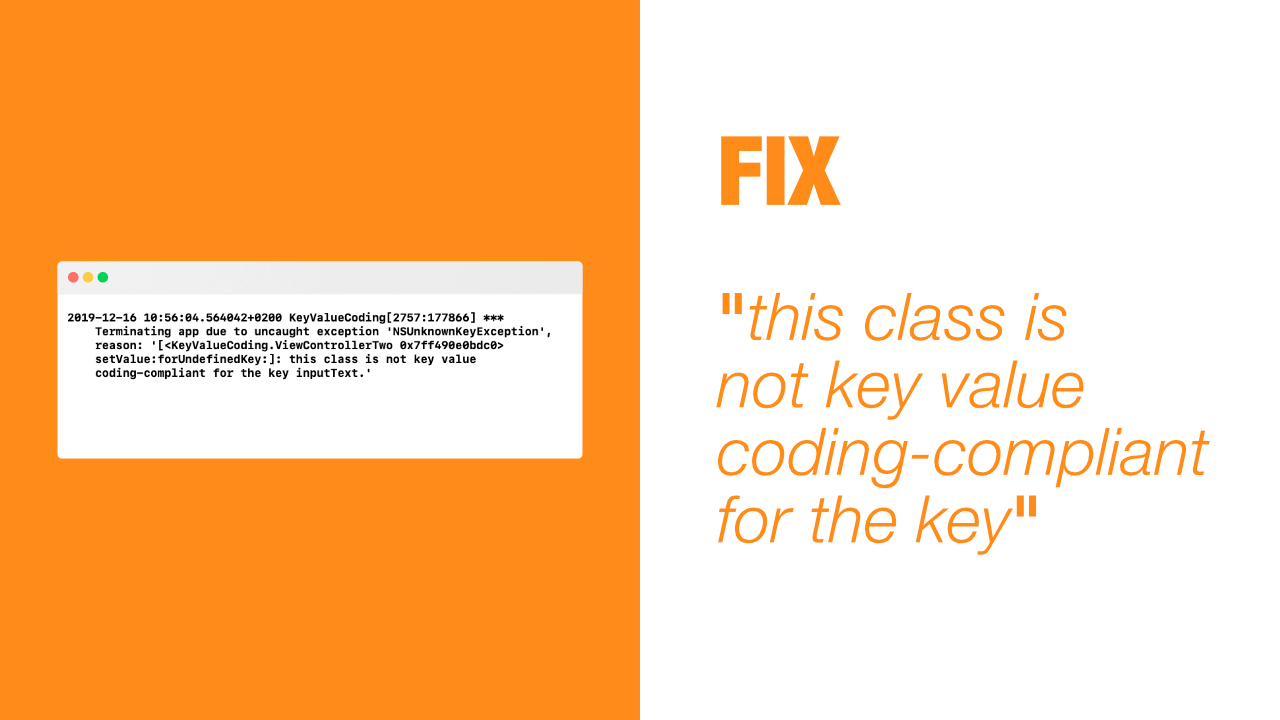
The error will look something like this:
Terminating app due to uncaught exception 'NSUnknownKeyException', reason: '[<KeyValueCoding.ViewController 0x7f91cef0ade0> setValue:forUndefinedKey:]: this class is not key value coding-compliant for the key inputText.In this case the last word, inputText, is what the Storyboard or XIB is expecting the IBOutlet to be named, but the IBOutlet name might have changed, the IBOutlet could have been removed, or the Custom Class in the Identifier inspector could have been changed to another class.
Reproducing the issue
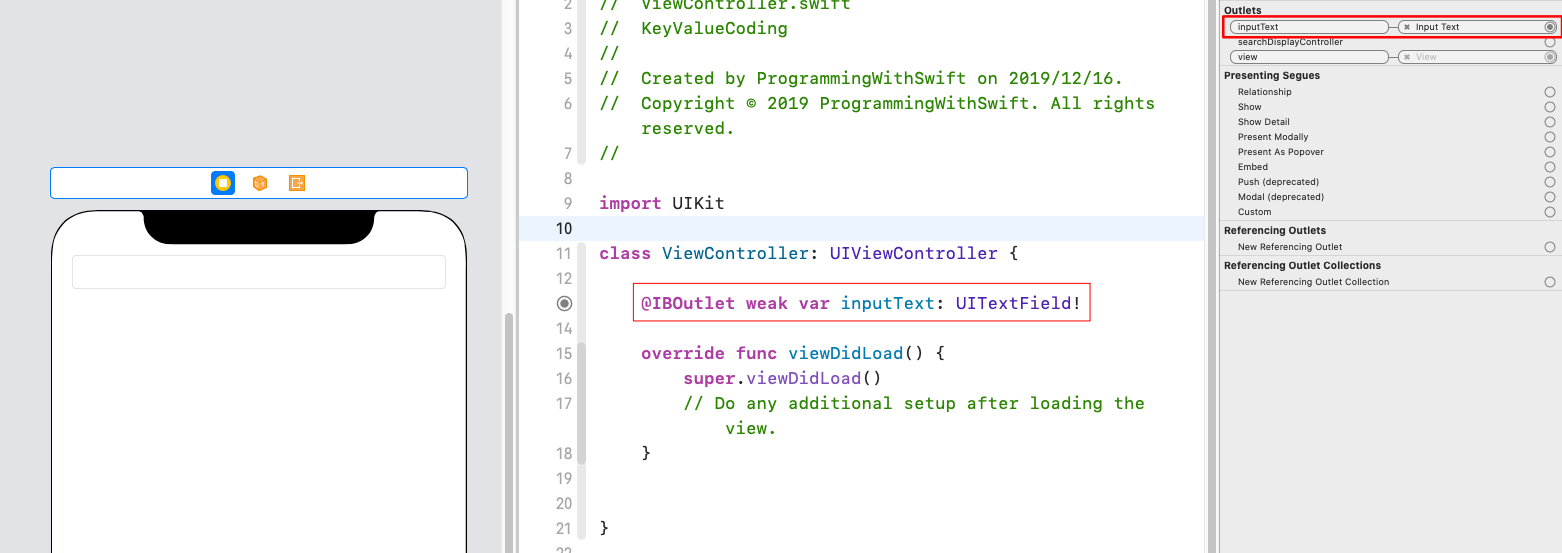
I have a simple project setup. In my storyboard I have one textfield that I have created an IBOutlet for. This IBOutlet is called inputText.
This is a screenshot of my setup:
The above setup does not crash and works as expected. There are three ways I am going to make it crash, two are are very similar and are probably the most common, the third way can be more tricky.
Type 1: IBOutlet not matching Storyboard Referencing Outlet
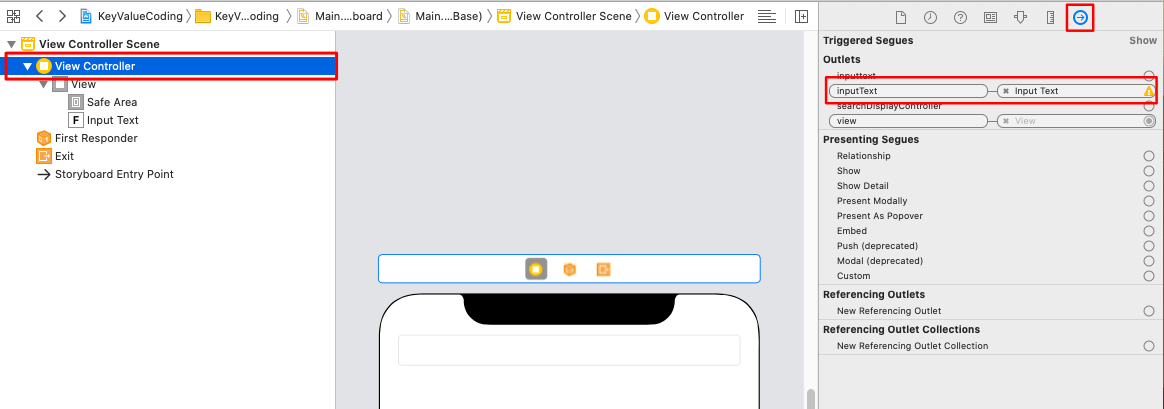
If I change my inputText name to something else like inputtext. I have misspelt it by making one of the t's lower case.
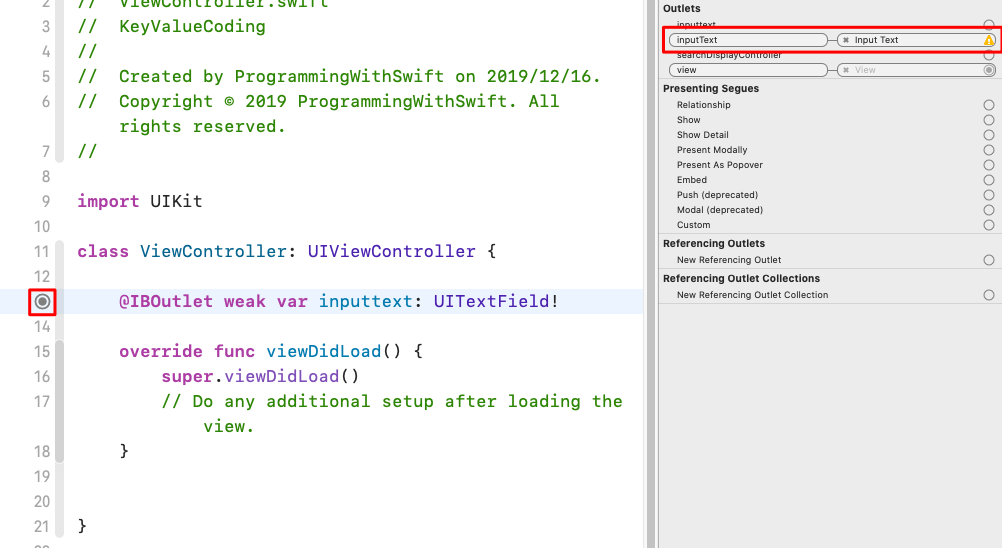
As you can see in the above screenshot. I have updated the name of my IBOutlet to inputtext. The indicator on the left hand side is still saying that it is connected to the textfield in my storyboard, but if you look at the Connections inspector on the right, there is a small yellow triangle warning that there is an issue with the outlet.
Unfortunately most of the time one might close the Connections inspector or you might only have the view controller code open, if that is the case you can easily miss this issue due to Xcode not showing that there is an issue with the IBOutlet when you are in an editor window.
The easiest way to fix this is to either fix the spelling mistake, so in this case I could change my IBOutlet name to the expected name of inputText, or one would need to disconnect the textfield from the `IBOutlet.
There are two ways to remove the reference to the IBOutlet and both ways need to be done from Interface Builder.
The first way is to right click on the view that has the incorrect outlet and then click on the `x` to delete the reference:
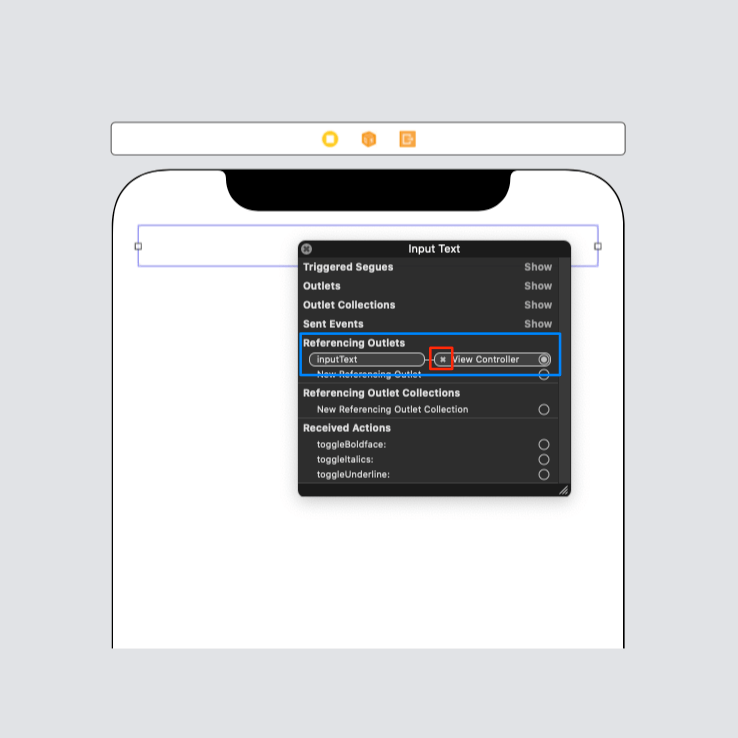
In the above picture I have highlighted the referencing outlets with blue, and then I have highlighted the x button in red. If you click on the x it will remove the referencing outlet. If you still need to have an outlet for that view, you will need to re-add the outlet to your code.
The other way to do it, and the way that I normally do it, is to use the Connections inspector. To do this you can either click on the specific view in Interface Builder, or you can click on the view controller in Interface Builder and then open the Connections inspector.
If you click on the view controller it will look like this:
Once again, there is a small x button that you would click in order to delete the outlet reference.
If you click on the view it will look like this:
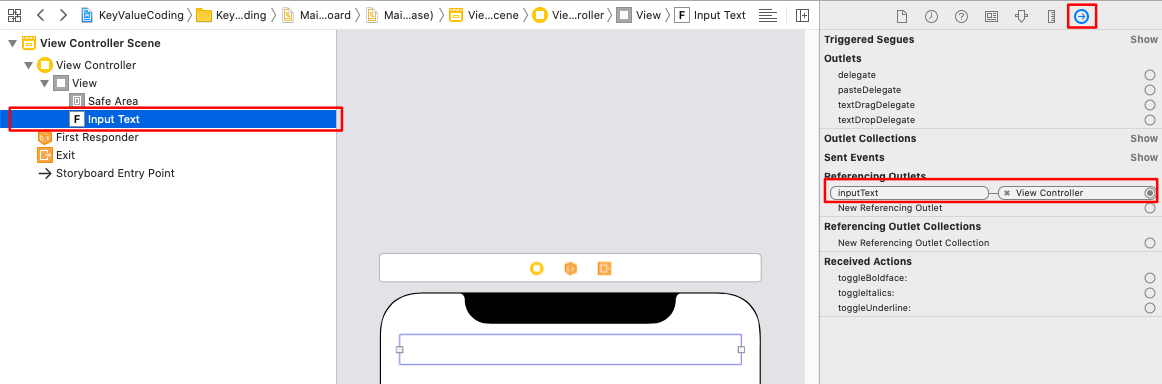
It is almost the same but if you click on the view then the reference to the outlet will be under the Referencing Outlets heading instead of the Outlets heading.
Type 2: IBOutlet does not exist
This can happen if you have created an outlet but for some reason you removed the IBOutlet in code. For this example I will just comment out the outlet so as to give a better visual example:
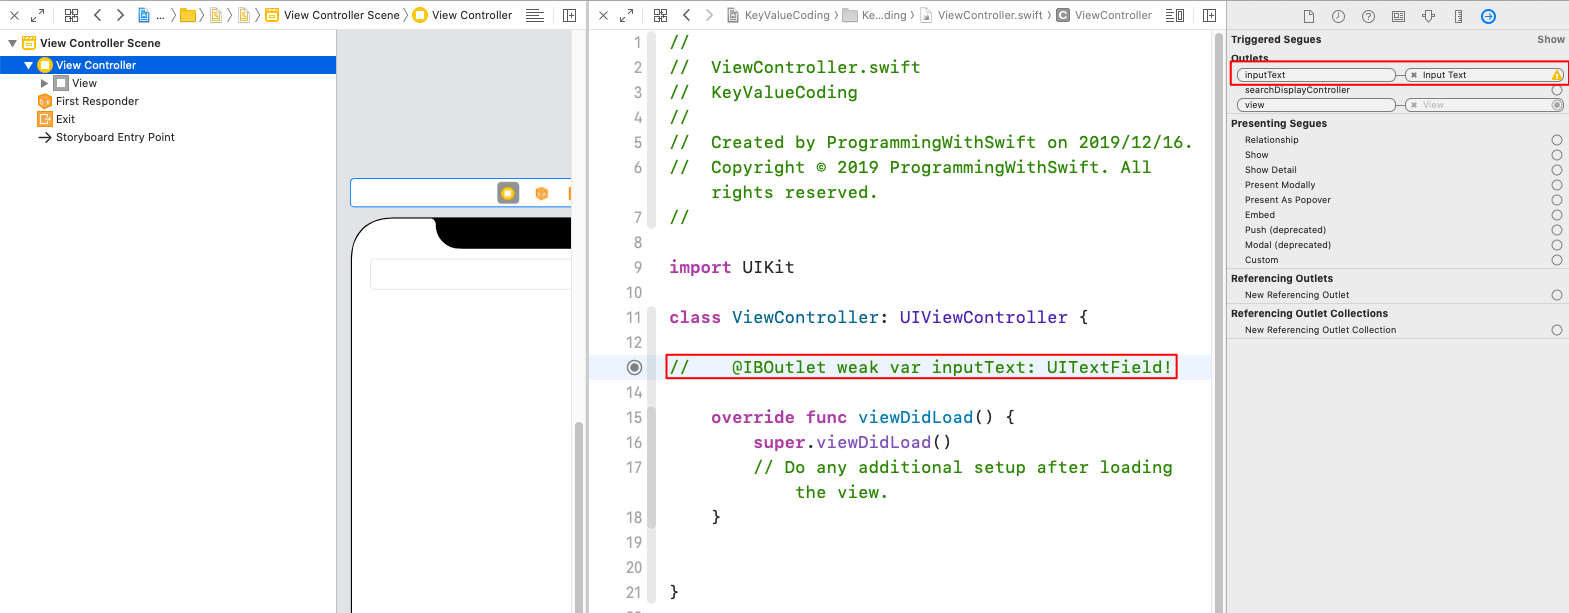
As you can see, I have commented out the IBOutlet in code, but in the Connections inspector on the right, it still shows that there is a connection, but it has the little warning triangle. If I build and run this it will crash as expected.
One interesting thing with this is that Xcode still shows the circle next to the commented out IBOutlet, but you can ignore this.
Type 3: ViewController in storyboard is linked to incorrect Custom Class
The final way that we can get this error is to use the incorrect class. I have added the following class to my ViewController file. My new class is called ViewControllerTwo and it looks like this:
class ViewControllerTwo: UIViewController {
override func viewDidLoad() {
super.viewDidLoad()
}
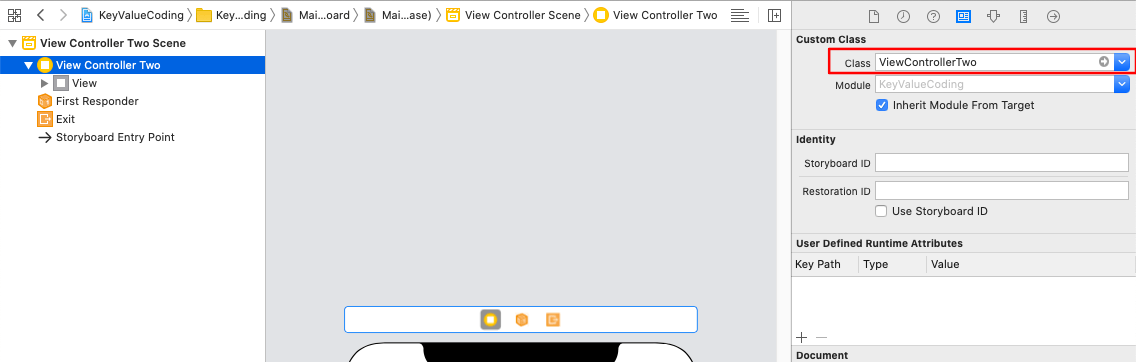
}As you can see there are no IBOutlets in this class. And at the moment this class is not connected to my Storyboard. Let's connect it to my storyboard. To connect it all you need to do is to click on the View Controller in the storyboard and then on the right hand side click on the Identity inspector:
This is what it looks like before I change the Custom class:

On the right I have highlighted the empty Class field. In the next screenshot I will have updated it to have ViewControllerTwo as my class:
When I build and run this now it will crash like the previous examples. This happens because the textfield still has a referencing outlet, but there is no IBOutlet in the view controller.
There are two ways to fix this, either undo the change that I just done, so I would remove ViewControllerTwo from the Class field in the above screenshot, or I can follow the fix from Type 1 above, and remove the referencing outlet.
Conclusion
This can be a tricky problem when you are starting out as an iOS developer, but once you have fixed it a couple of times it will become second nature to know that you need to either remove the referencing outlet, or make sure that you are using the correct class for the view/view controller that you are busy working with.