How to add header/footer view to UITableView in Storyboard


In this tutorial you will learn how to add a header and a footer view to a UITableView. There are two ways that we can add the header and footer, one way is to add it in using Interface Builder and the other way is to do it with code. In this tutorial we will be using both Interface Builder as well as code.
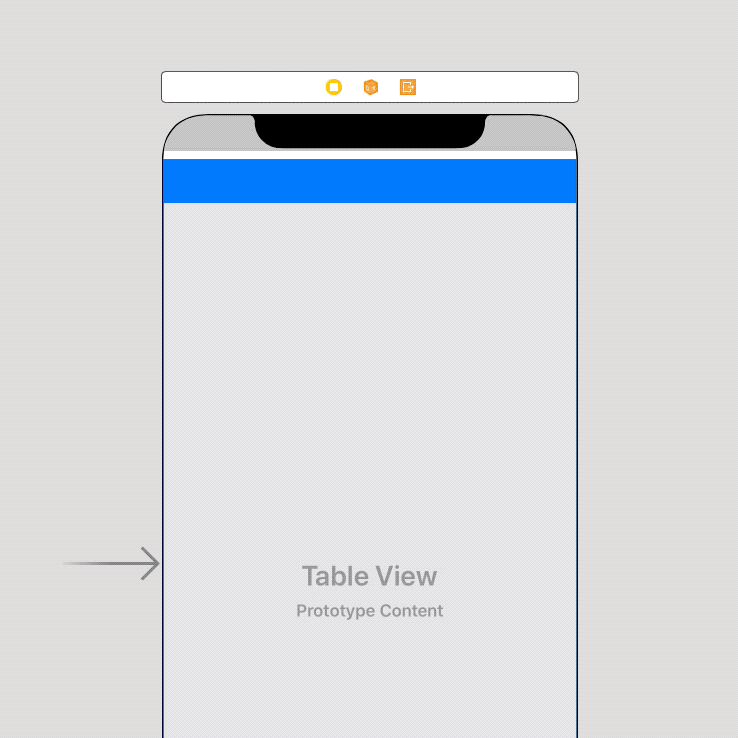
Step 1: Setup the UITableView
The first thing that we need to do is to set up the UITableView and get it to show some data.
I will assume that you have a UITableView in your Storyboard and that you have already created an outlet for it.
What we would need to do now, is adopt the UITableViewDataSource and UITableViewDelegate protocols. To do this, update your view controller class to look like this:
class ViewController: UIViewController, UITableViewDelegate, UITableViewDataSourceNow that we have adopted those two protocols, we need to set the tableviews delegate and datasource to self. I will be doing this in the viewDidLoad method. Add the following two lines to your viewDidLoad method:
self.tableView.delegate = self
self.tableView.dataSource = self
There are two more things that we need to do and then our tableview will be set up. Lets add in our numberOfRowsInSection and cellForRowAt methods:
func tableView(_ tableView: UITableView,
numberOfRowsInSection section: Int) -> Int {
return 5
}
func tableView(_ tableView: UITableView,
cellForRowAt indexPath: IndexPath) -> UITableViewCell {
let cell = UITableViewCell()
cell.textLabel?.text = "Example content"
return cell
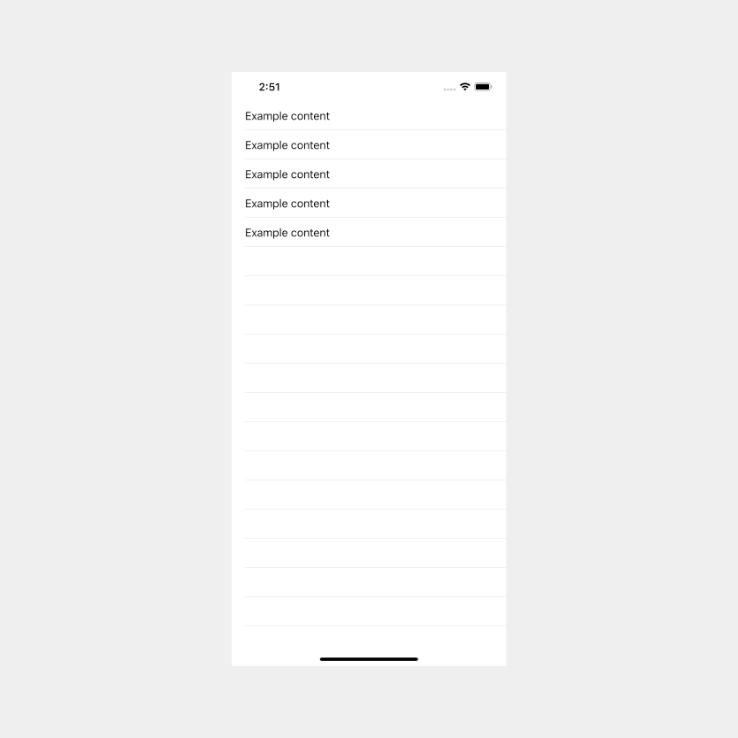
}Ok, if you build and run the app it should look like this:
Step 2: Add header to UITableView in Storyboard
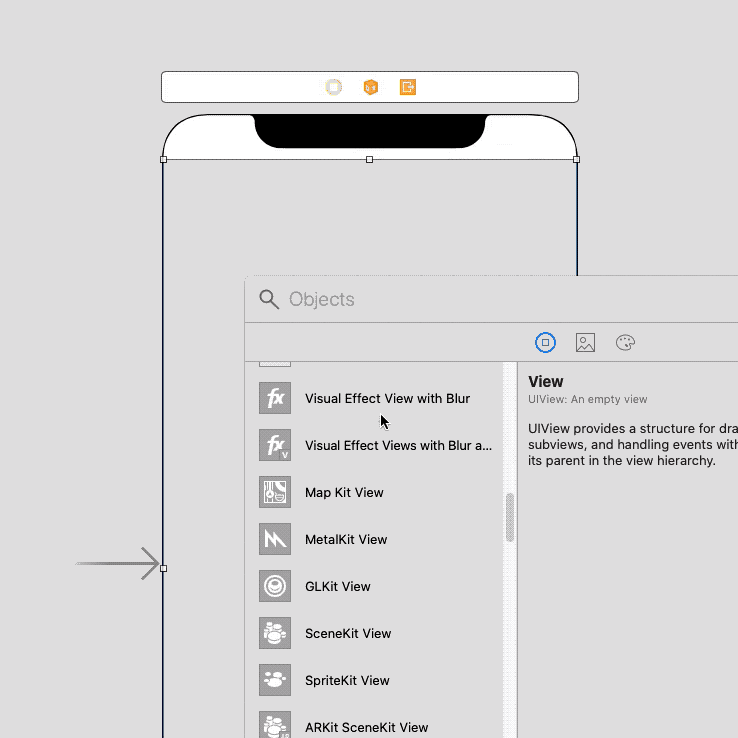
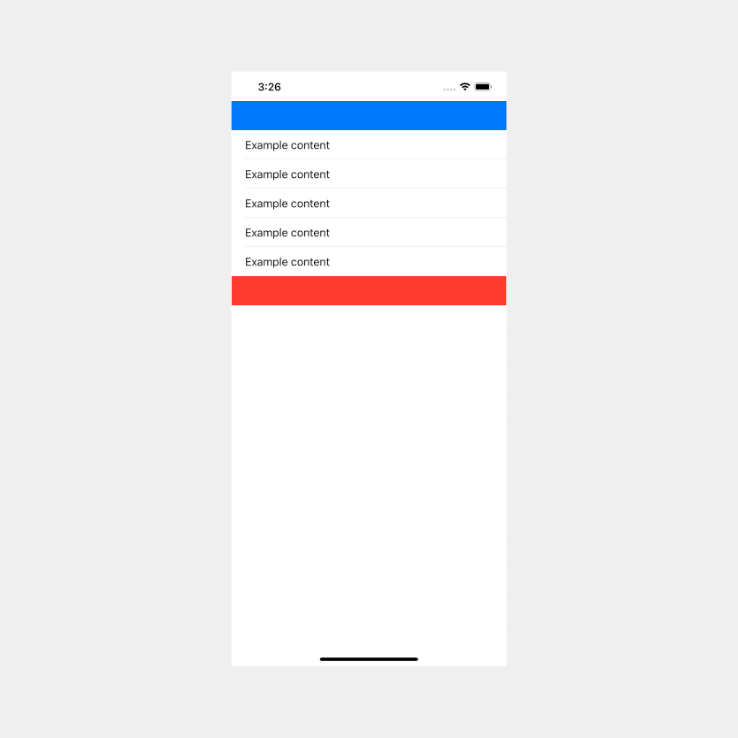
Adding a header to the tableview in Interface Builder is easy, once you have your tableview drag a new view over the tableview towards the top, a blue line should appear, when it does you can place the view. See the below gif:
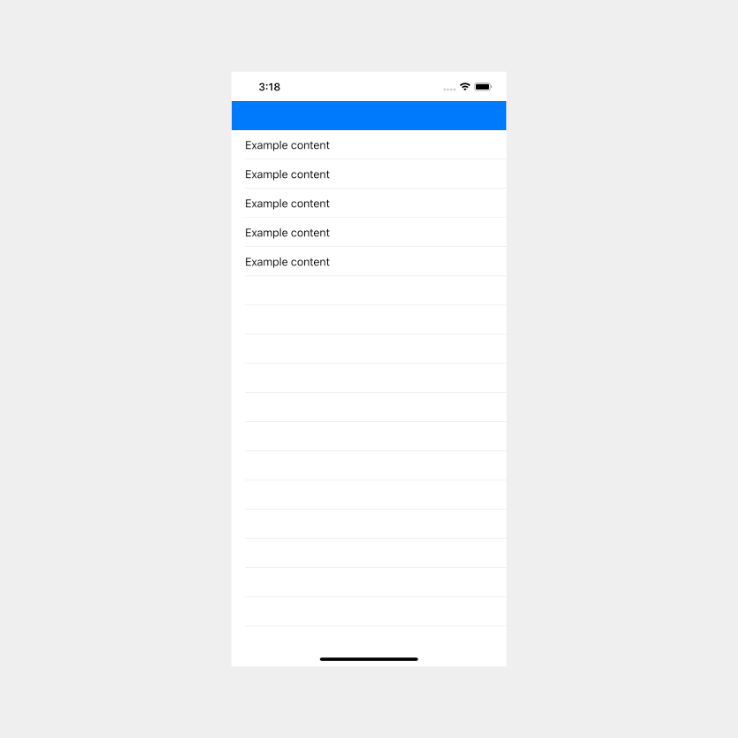
The next thing we are going to do is change the background color of the view to blue so that it is easier to see.
If you build and run the app you should see the following:
Step 3: Add footer to UITableView in Storyboard
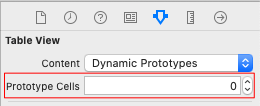
The footer is basically the same as the header but there can be a catch if you only want a footer view. To only have a footer view, you will need to add a prototype cell, that will allow you to add a footer view below the cell.
Let's add a footer now, again, we just need to drag a new view onto the table view, but this time place it below the other view. When you place it below the other view you should see a blue line again, when you do, it will be in the correct position. See gif below:
I am going to change the color of the footer view to red. Once that is done, build and run the app, it should look like this:
Using Interface Builder is that simple. In the next steps we will add the header and footer with code. There are two ways that we can do it with code, and we will go through both of those ways.
Step 4: Add header to UITableView with code
I am going to remove the header and the footer in Interface builder, so that we can add them back in with code.
As I mentioned before there are two ways to add a header and footer view, but there are also two ways using just code. The first way will use set the tableViewHeader property on the tableview and the second way will use UITableViewDelegate methods. The second way is more powerful and it allows you to easily create a header for sections of a tableview.
Add header using tableview property
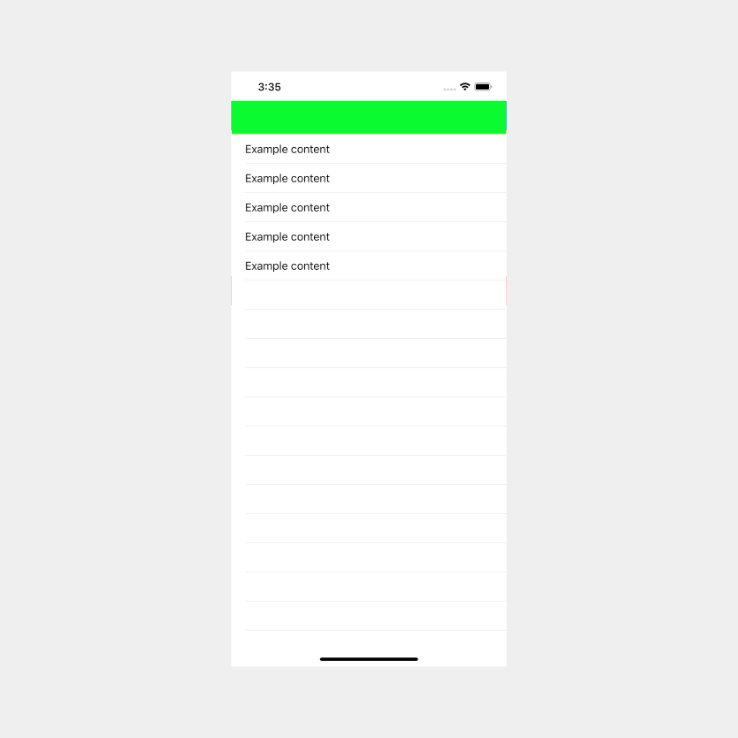
I have added the following code to my viewDidLoad method.
let headerView = UIView(frame: CGRect(x: 0,
y: 0,
width: self.tableView.frame.width,
height: 50))
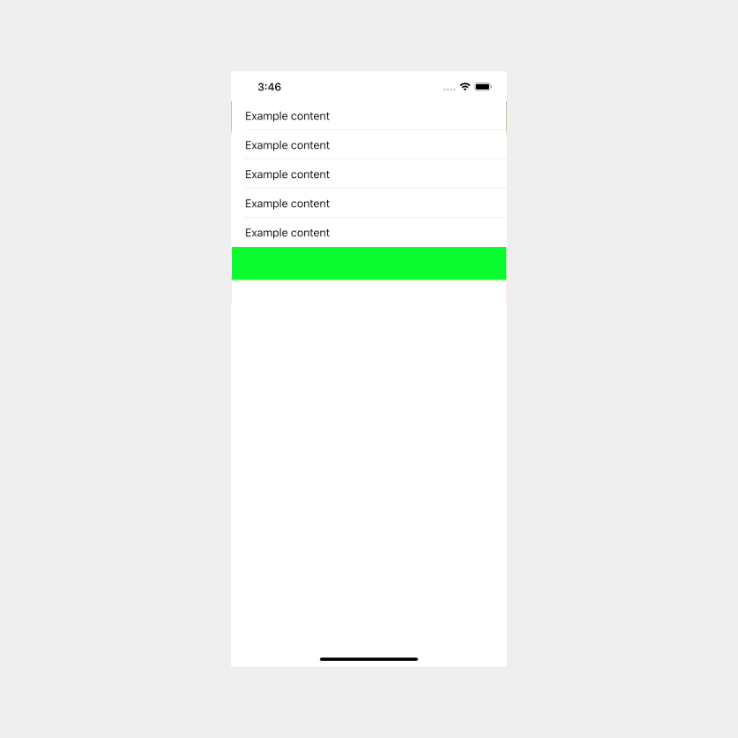
headerView.backgroundColor = .green
self.tableView.tableHeaderView = headerViewIf you build and run you should see the following:
Add header using tableview delegate methods
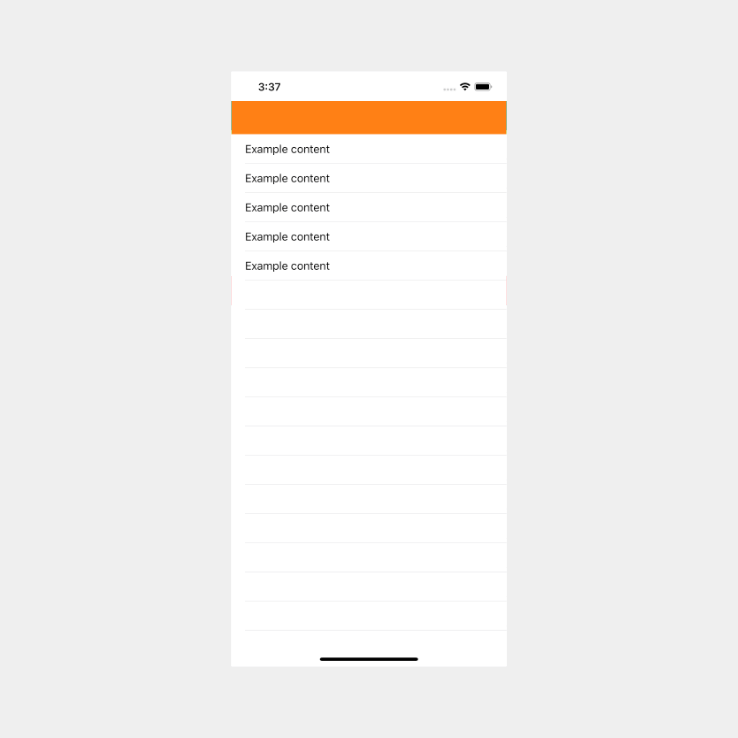
The view code itself is the same as when we used the tableview property. The only difference is that we need to use two of the UITableViewDelegate methods, namely, heightForHeaderInSection and viewForHeaderInSection.
Add the following methods to you view controller:
func tableView(_ tableView: UITableView,
heightForHeaderInSection section: Int) -> CGFloat {
return 50
}
func tableView(_ tableView: UITableView,
viewForHeaderInSection section: Int) -> UIView? {
let headerView = UIView(frame: CGRect(x: 0,
y: 0,
width: self.tableView.frame.width,
height: 50))
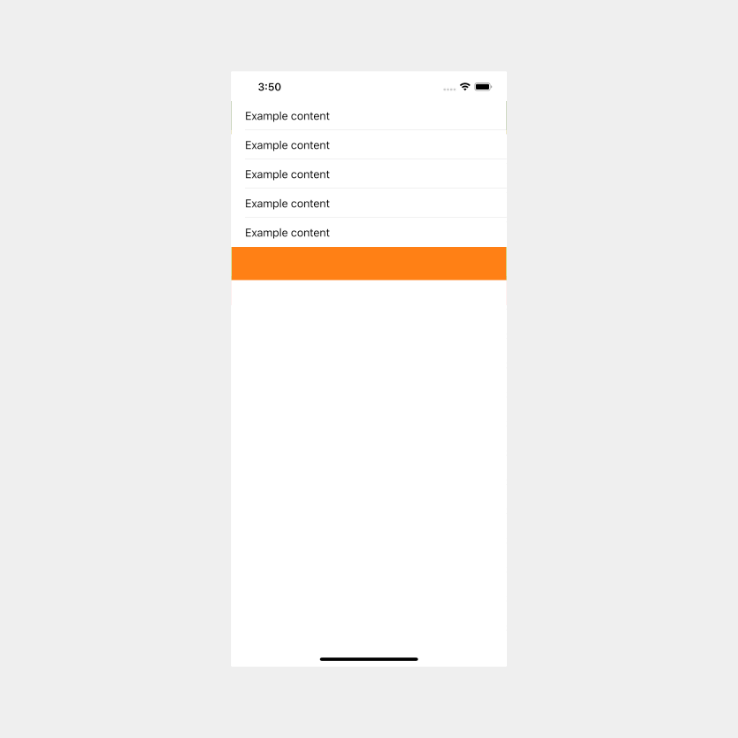
headerView.backgroundColor = .orange
return headerView
}If you build and run the app now your app should look like this:
Step 5: Add footer to UITableView with code
This is basically exactly the same as adding a header. Instead of using the tableHeaderView property we will use tableFooterView property, and the delegate methods will change from the header methods that we used, to the footer methods.
Add footer view with property
This is the code for the footer using the tableview property:
let footerView = UIView(frame: CGRect(x: 0,
                                      y: 0,
                                      width: self.tableView.frame.width,
                                      height: 50))
footerView.backgroundColor = .green
self.tableView.tableFooterView = footerView
If you build and run the app you should see this:
Add footer view with UITableViewDelegate methods
Add the following code to your view controller:
func tableView(_ tableView: UITableView,
               heightForFooterInSection section: Int) -> CGFloat {
    return 50
}

func tableView(_ tableView: UITableView,
               viewForFooterInSection section: Int) -> UIView? {
    let footerView = UIView(frame: CGRect(x: 0,
                                          y: 0,
                                          width: self.tableView.frame.width,
                                          height: 50))
    footerView.backgroundColor = .orange

    return footerView
}
If you build and run the app now you should see the following:
Conclusion
Adding header and footer views to a tableview is quite simple. Once you know how to do it, it is very easy to do in the future.
The full code will be put on GitHub, I have commented out using the tableview properties and the the delegate methods will be used to add the header and footer views.