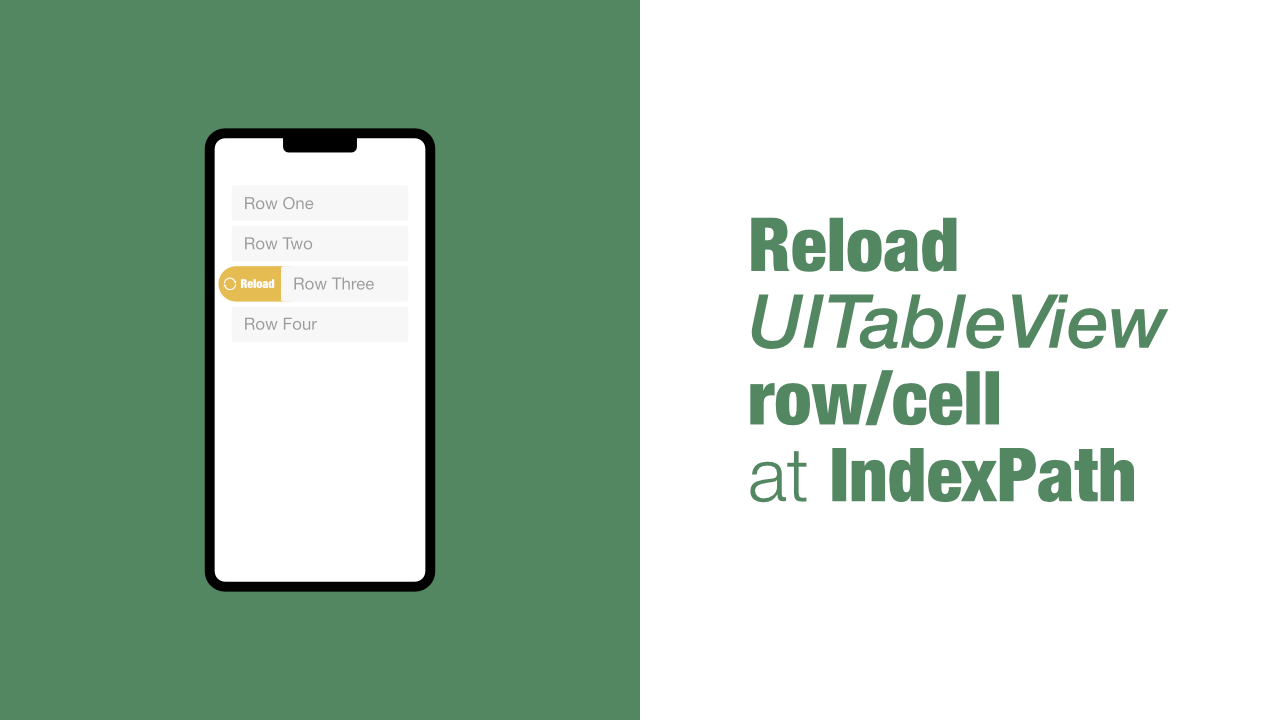
Reload UITableView row/cell at IndexPath

Reloading an entire table view is not always the best way to update the data in the table view. It might be better to reload specific rows/cells in the table view. In today's tutorial we will be learning how to do this, luckily, Apple has made this very easy for us.
Step 1: Setup UITableView
If you want to jump straight to reloading cells at an IndexPath then you might want to skip to Step 2.
I am starting with a completely blank project, so everything I do will be done in my default ViewController. I have already dragged my table view into my ViewController so that we can set it up.
If you need to know how to add a table view to your view controller, you can checkout this video. Just note, the video adds a prototype cell, I have not added one although it should not make a difference. The other difference is that my table view outlet is named as tableview where the video calls it myTableView.
Ok, let's get to setting up the table view now. The first thing that we need to do is to adopt and conform to the required protocols that will be used in this tutorial.
Adopt the UITableViewDataSource and UITableViewDelegate protocols, for me it looks like this:
class ViewController: UIViewController, UITableViewDelegate, UITableViewDataSourceNow that we have adopted them, we can conform to them. The methods that we are required to implement are numberOfRowsInSection and cellForRowAt indexPath. Add the following two methods to your view controller:
func tableView(_ tableView: UITableView, numberOfRowsInSection section: Int) -> Int {
    return 5
}

func tableView(_ tableView: UITableView, cellForRowAt indexPath: IndexPath) -> UITableViewCell {
    return UITableViewCell()
}
This is not going to be the final implementation of these methods, we will update them as soon as we have created our data. These methods also will not run yet as we need to set the delegate and datasource on our table view outlet. Don't build and run the app just yet, if you do, nothing will happen.
Create the data
All we need for our data is a simple array of strings. Add the following array to the top of your view controller:
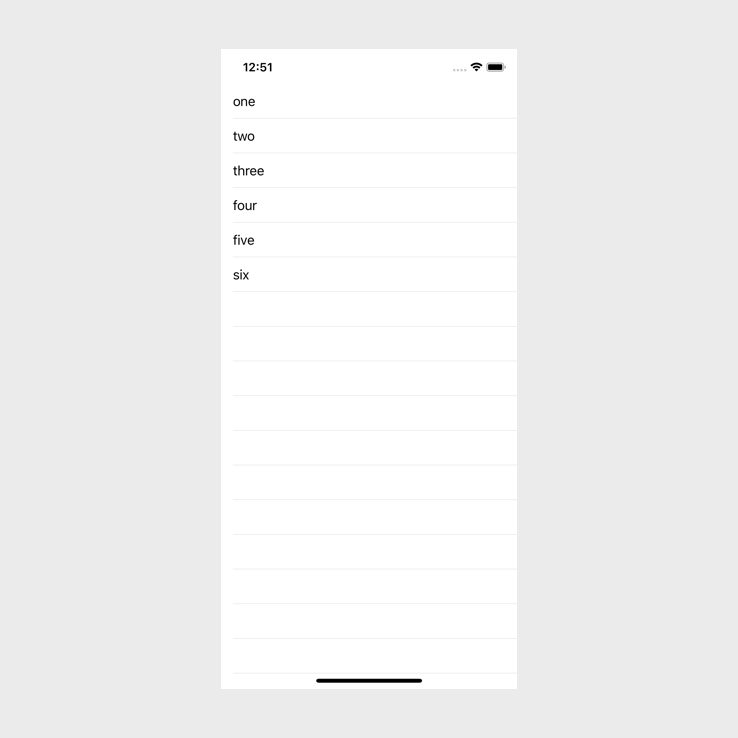
var tableviewData = ["one", "two", "three", "four", "five", "six"]Set datasource and delegate on table view outlet
To set the datasource and the delegate on the table view, add the following code to the viewDidLoad method below super.viewDidLoad:
self.tableview.delegate = self
self.tableview.dataSource = self
Update Datasource methods
Now that we have our data we need to update the numberOfRowsInSection and cellForRowAt indexPath methods that we added earlier in this tutorial. To do this, replace those two methods with the below code:
func tableView(_ tableView: UITableView, numberOfRowsInSection section: Int) -> Int {
    return self.tableviewData.count
}

func tableView(_ tableView: UITableView, cellForRowAt indexPath: IndexPath) -> UITableViewCell {
    let cell = UITableViewCell()
    cell.textLabel?.text = self.tableviewData[indexPath.row]

    return cell
}
We have now updated the numberOfRowsInSection to return the count of our tableviewData.
In the cellForRowAt indexPath method, we created a new instance of UITableViewCell and then we set the text of the textLabel on the cell. The string that we use to set the textLabel comes from out tableviewData array.
If you build and run the app now, you should see the following:
Step 2: Reload cell at IndexPath
We now have almost everything we need. The last thing that we need to add is the didSelectRowAt indexPath. This will allow us to get an index path easily so that we can update the row at that IndexPath.
Add the following method below the cellForRowAt indexPath:
func tableView(_ tableView: UITableView, didSelectRowAt indexPath: IndexPath) {
    // Code here
}
With this method we can get the index path from the tapped cell. Next we will add the code that will reload each cell that we tap on, but, if the indexPath.row is 3, we will update our tableviewData as well. This will allow us to see that specific row change.
To do that, add the following code inside the didSelectRowAt indexPath method:
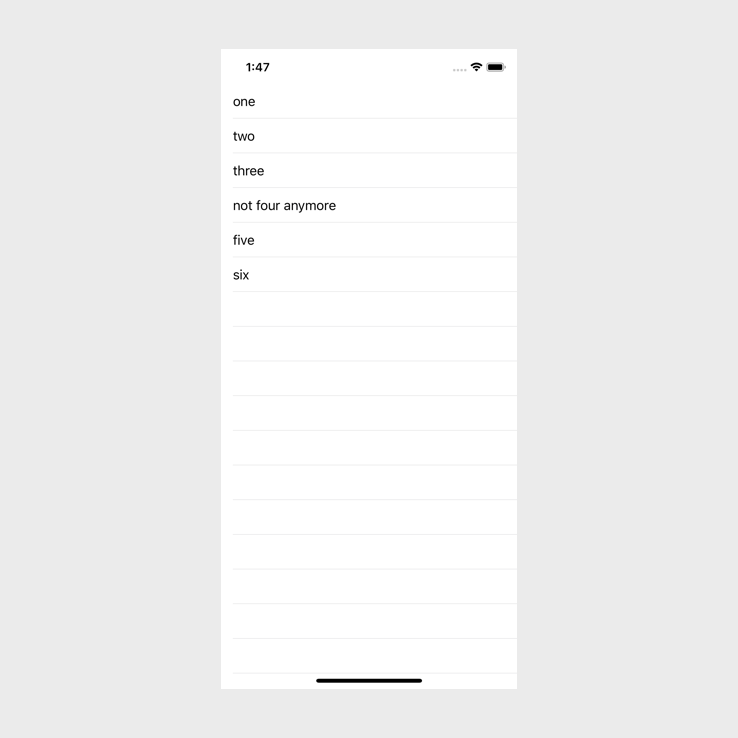
if indexPath.row == 3 {
    self.tableviewData[3] = "not four anymore"
}

self.tableview.reloadRows(at: [indexPath],
                          with: .fade)
This last bit of code will update the data and reload the cell that we tapped on. We are only going to update the array at index 3, this means that if we tap on the second row we won't update the data but we will reload the second row.
If you want to reload multiple rows all you need to do is add the index paths for those rows to the array that we pass to reloadRows. Something like this:
self.tableview.reloadRows(at: [indexPathOne, indexPathTwo, indexPathThree],
                          with: .fade)
Now, if you build and run the app and tap on the row that says four, you will see that it updates. As you can see below, this is what the app will look like after tapping the row that says four:
Conclusion
Reloading a cell/row at an IndexPath is easy and all you need to use is the reloadRows(at:, with:).
If you want to see the full source code for this tutorial, you can find it here.