Save Images Locally with Swift 5
Learn how to save images locally with swift 5. Save images to UserDefaults and to Disk.

Depending on what you are building, it could be useful to save images locally. In this tutorial I will show you the basics of how to save an image to UserDefaults as well as to the file system. You will be able to use the same technique to save an image to Core Data, but I will not be showing you how to do that.
Why save images locally?
There are many reasons for wanting to save images locally on a users device. You might want to save the images so that you do not need to download them again, or, you might be building an app that edits images. These are only a few of the reasons that you may want to save images locally.
If you only want to know how to read and write to the documents directory, check out this tutorial
Base implementation
Like I mentioned before, we are going to build an app that allows us to save an image locally. We will be using UserDefaults and file system in order to save locally. To get started we will start by writing the foundational code and then later on we will add the implementation code for each method of saving the images.
Let's start by creating the StorageType enum. This enum will have two cases, userDefaults and fileSystem. This will be used in the store and retrieveImage functions that we will be creating later on.
enum StorageType {
    case userDefaults
    case fileSystem
}
Now that we have the storage types we can start creating the foundations of the store and retrieveImage functions.
The store function will take three parameters. image, this will be of type UIImage, key, this will be of type String and will be a unique name for the image we want to save/retrieve, and finally we will pass through the storageType.
private func store(image: UIImage, forKey key: String, withStorageType storageType: StorageType) {
    // Implementation
}
We now have our function. We should be able to add some of the base logic to it now. In this function we want to take a UIImage and convert it to Data. This will make it much easier for use to store the image. We also want to use the correct file storage. Update your store function with the following
private func store(image: UIImage, forKey key: String, withStorageType storageType: StorageType) {
    if let pngRepresentation = image.pngData() {
        switch storageType {
        case .fileSystem:
            // Save to disk
        case .userDefaults:
            // Save to user defaults
        }
    }
}
We have now created the foundations of our store function. Later on we will implement each of the saving methods, but for now we are going to move on to getting the foundational code written for our retrieve function.
The retrieveImage function is going to take two arguments. The first argument will be, key, which will be the same as the key in the storefunction. The second argument will be storageType, again, this will be used in the same way as it is used in the store function.
private func retrieveImage(forKey key: String, inStorageType storageType: StorageType) -> UIImage? {
    switch storageType {
    case .fileSystem:
        // Retrieve image from disk
    case .userDefaults:
        // Retrieve image from user defaults
    }
}
And that is all that is needed for the foundation code. We can now start implementing the UserDefaults save and retrieve functionality.
Saving and retrieving image with UserDefaults
The UserDefaults is the easier way to save the images. In our code that we have written so far we have already converted our UIImage to Data. All we need to do now is to save and retrieve it.
Lets do the saving first. To save the data to UserDefaults update your storemethod to look like the below code.
private func store(image: UIImage, forKey key: String, withStorageType storageType: StorageType) {
    if let pngRepresentation = image.pngData() {
        switch storageType {
        case .fileSystem:
            // Save to disk
        case .userDefaults:
            UserDefaults.standard.set(pngRepresentation, forKey: key)
        }
    }
}
That was quite easy, a nice one liner to save the image when using UserDefaults. Ok, now let's implement the retrieveImage functionality for UserDefaults.
private func retrieveImage(forKey key: String, inStorageType storageType: StorageType) -> UIImage? {
    switch storageType {
    case .fileSystem:
        // Retrieve image from disk
    case .userDefaults:
        if let imageData = UserDefaults.standard.object(forKey: key) as? Data,
            let image = UIImage(data: imageData) {

            return image
        }
    }
}
So that was almost as simple as storing the image. Because UserDefaults stores Data as Any type, we need to cast it back to Data when we retrieve it. Once we do that, we instantiate a new UIImage with the imageData and then we return that UIImage that we initialised.
Save and retrieve image with File System
Using the file system is quite a bit more complicated than using UserDefaults. We are going to start off by writing a small helper method called filePath. filePath will only take one argument called key. The key argument is the same key that we use in other places in our code.
private func filePath(forKey key: String) -> URL? {
    let fileManager = FileManager.default
    guard let documentURL = fileManager.urls(for: .documentDirectory,
                                            in: FileManager.SearchPathDomainMask.userDomainMask).first else { return nil }

    return documentURL.appendingPathComponent(key + ".png")
}
This filePath method doesn’t do too much, but it will help out later on. Basically all this method will do is get the url for the home directory on the device. It will then append the key.png to the url and return that value. I have used the png extension in this example as we are only working with png data in this example.
Ok, now that we have our helper function we can implement the .fileSystemfunctionality in the store function. Update your store function to look like the below function.
private func store(image: UIImage,
                    forKey key: String,
                    withStorageType storageType: StorageType) {
    if let pngRepresentation = image.pngData() {
        switch storageType {
        case .fileSystem:
            if let filePath = filePath(forKey: key) {
                do  {
                    try pngRepresentation.write(to: filePath,
                                                options: .atomic)
                } catch let err {
                    print("Saving file resulted in error: ", err)
                }
            }
        case .userDefaults:
            UserDefaults.standard.set(pngRepresentation,
                                        forKey: key)
        }
    }
}
Since the filePath function returns an optional URL we need to unwrap it before we can use it. Once we have unwrapped it we need to write the data to that filePath. Luckily for us Data has a write method which we can use to write the data to a file. This is where we will use the filePath that our helper method has returned. The write method can throw an error so we need to make sure do wrap it in a do catch. You should now be able to write the image data to disk.
This was a little bit more complicated but not too much more complicated, so let's move straight into the retrieveImage function.
Update your retrieveImage function to look like the below:
private func retrieveImage(forKey key: String,
                            inStorageType storageType: StorageType) -> UIImage? {
    switch storageType {
    case .fileSystem:
        if let filePath = self.filePath(forKey: key),
            let fileData = FileManager.default.contents(atPath: filePath.path),
            let image = UIImage(data: fileData) {
            return image
        }
    case .userDefaults:
        if let imageData = UserDefaults.standard.object(forKey: key) as? Data,
            let image = UIImage(data: imageData) {
            return image
        }
    }

    return nil
}
Once again we start off by using our filePath helper method to return the URL to the file that we have stored. Once we have that URL we ask the FileManager to get the contents of that URL. Now that we have the file data we can use that data to instantiate a new UIImage. If none of the above produces a nil value we can return our image that we retrieved from disk.
That is it when it comes to the basics. You should now be able to read and write an image to the file system as well as to UserDefaults
Creating test UI
Now that we have all the functional stuff done we can test that everything is working as expected. To do this I have updated my Main.storyboard to look like the following:
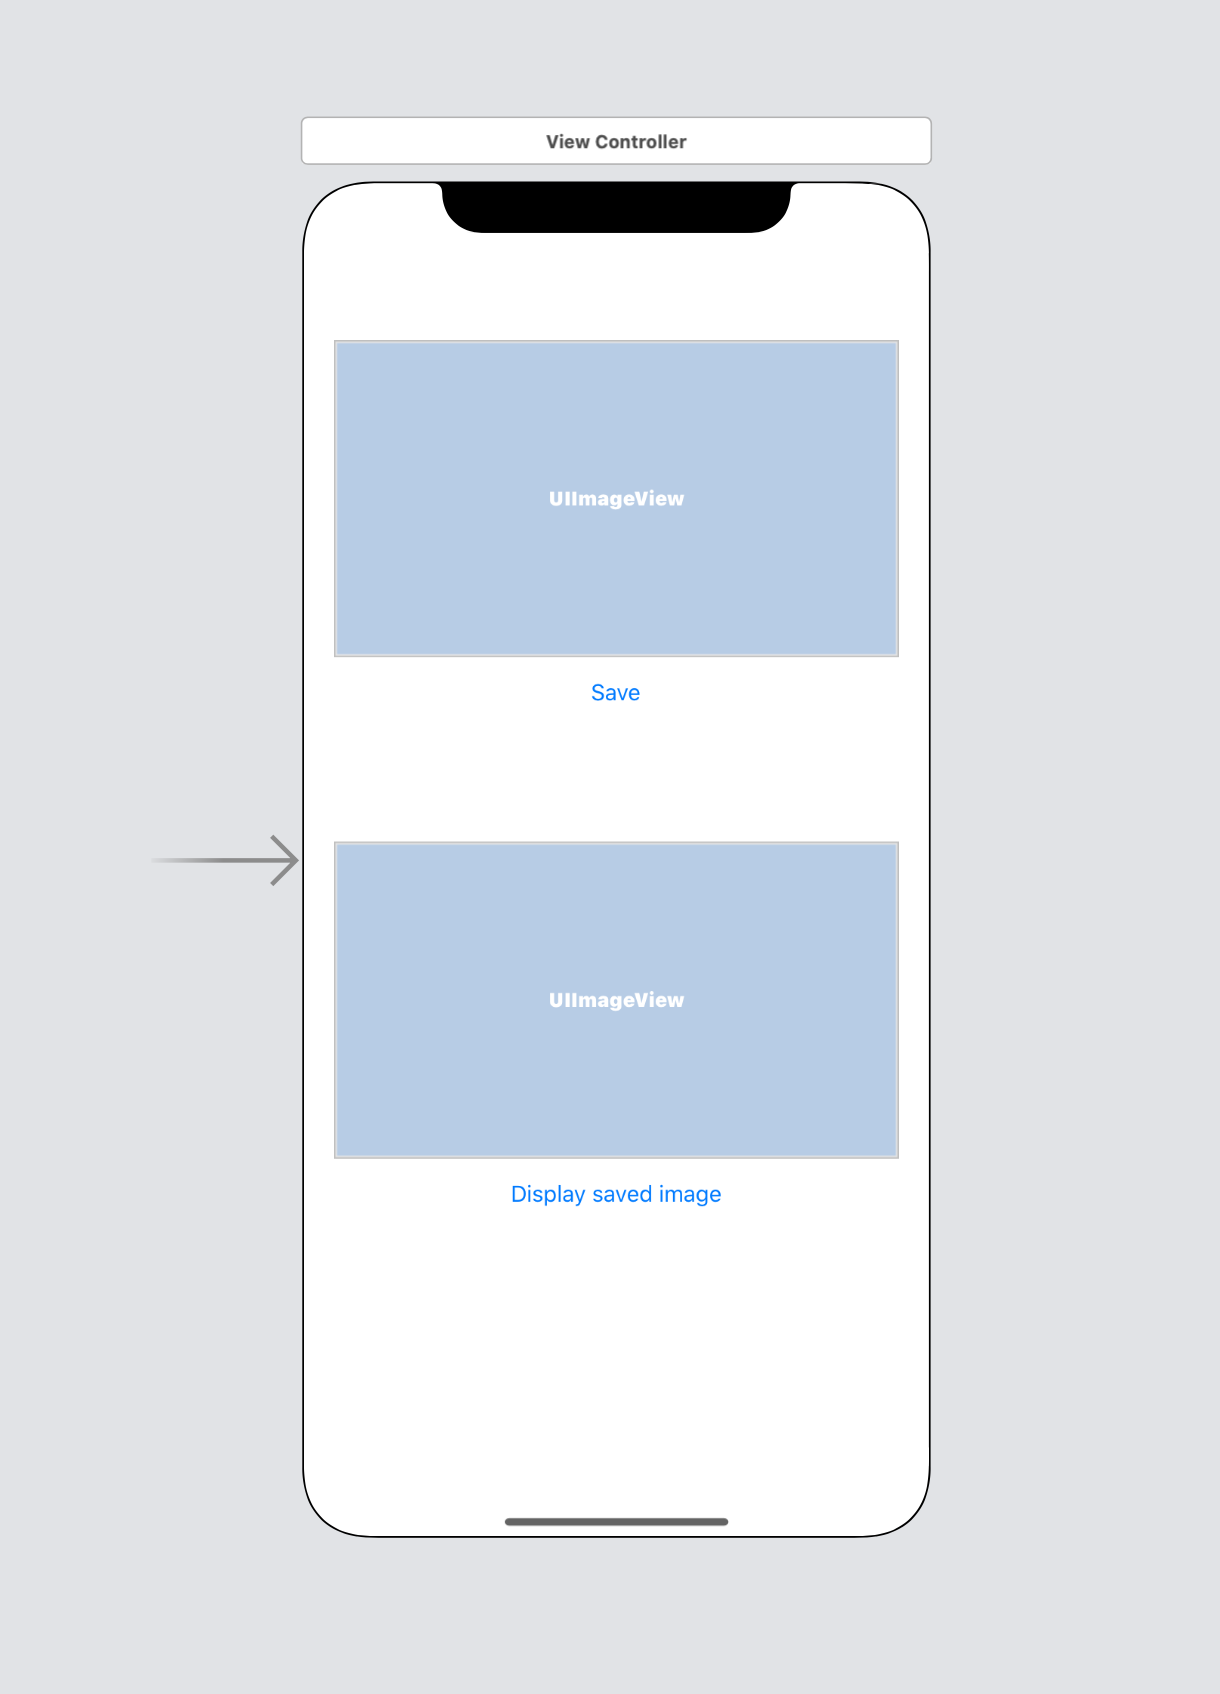
Once you have done that, created outlets for the two UIImageView’s and the two UIButton’s. My outlets look like this:
@IBOutlet weak var imageToSaveImageView: UIImageView! {
    didSet {
        imageToSaveImageView.image = UIImage(named: "building")
    }
}
@IBOutlet weak var saveImageButton: UIButton! {
    didSet {
        saveImageButton.addTarget(self,
                                    action: #selector(ViewController.save),
                                    for: .touchUpInside)
    }
}
@IBOutlet weak var savedImageDisplayImageView: UIImageView!
@IBOutlet weak var displaySaveImageButton: UIButton! {
    didSet {
        displaySaveImageButton.addTarget(self,
                                            action: #selector(ViewController.display),
                                            for: .touchUpInside)
    }
}
If you add this code you will not be able to build your project. So to fix that problem we need to implement those two functions, save and display. The save function will call the store function that we created earlier and the display function will call the retrieveImage function and then display the image that was returned, either from the fileSystem or from UserDefaults. These two functions look like this:
@objc
func save() {
    if let buildingImage = UIImage(named: "building") {
        DispatchQueue.global(qos: .background).async {
            self.store(image: buildingImage,
                        forKey: "buildingImage",
                        withStorageType: .fileSystem)
        }
    }
}

@objc
func display() {
    DispatchQueue.global(qos: .background).async {
        if let savedImage = self.retrieveImage(forKey: "buildingImage",
                                                inStorageType: .fileSystem) {
            DispatchQueue.main.async {
                self.savedImageDisplayImageView.image = savedImage
            }
        }
    }
}
I have wrapped calling the store and the retrieveImages in DispatchQueue’s because if you don’t then it will block the main thread.
The last thing that we need to do is to add the building image to our project. To do that you need to download the image from here, and then open Assets.xcassets in Xcode and drag the building image into Xcode, like this:
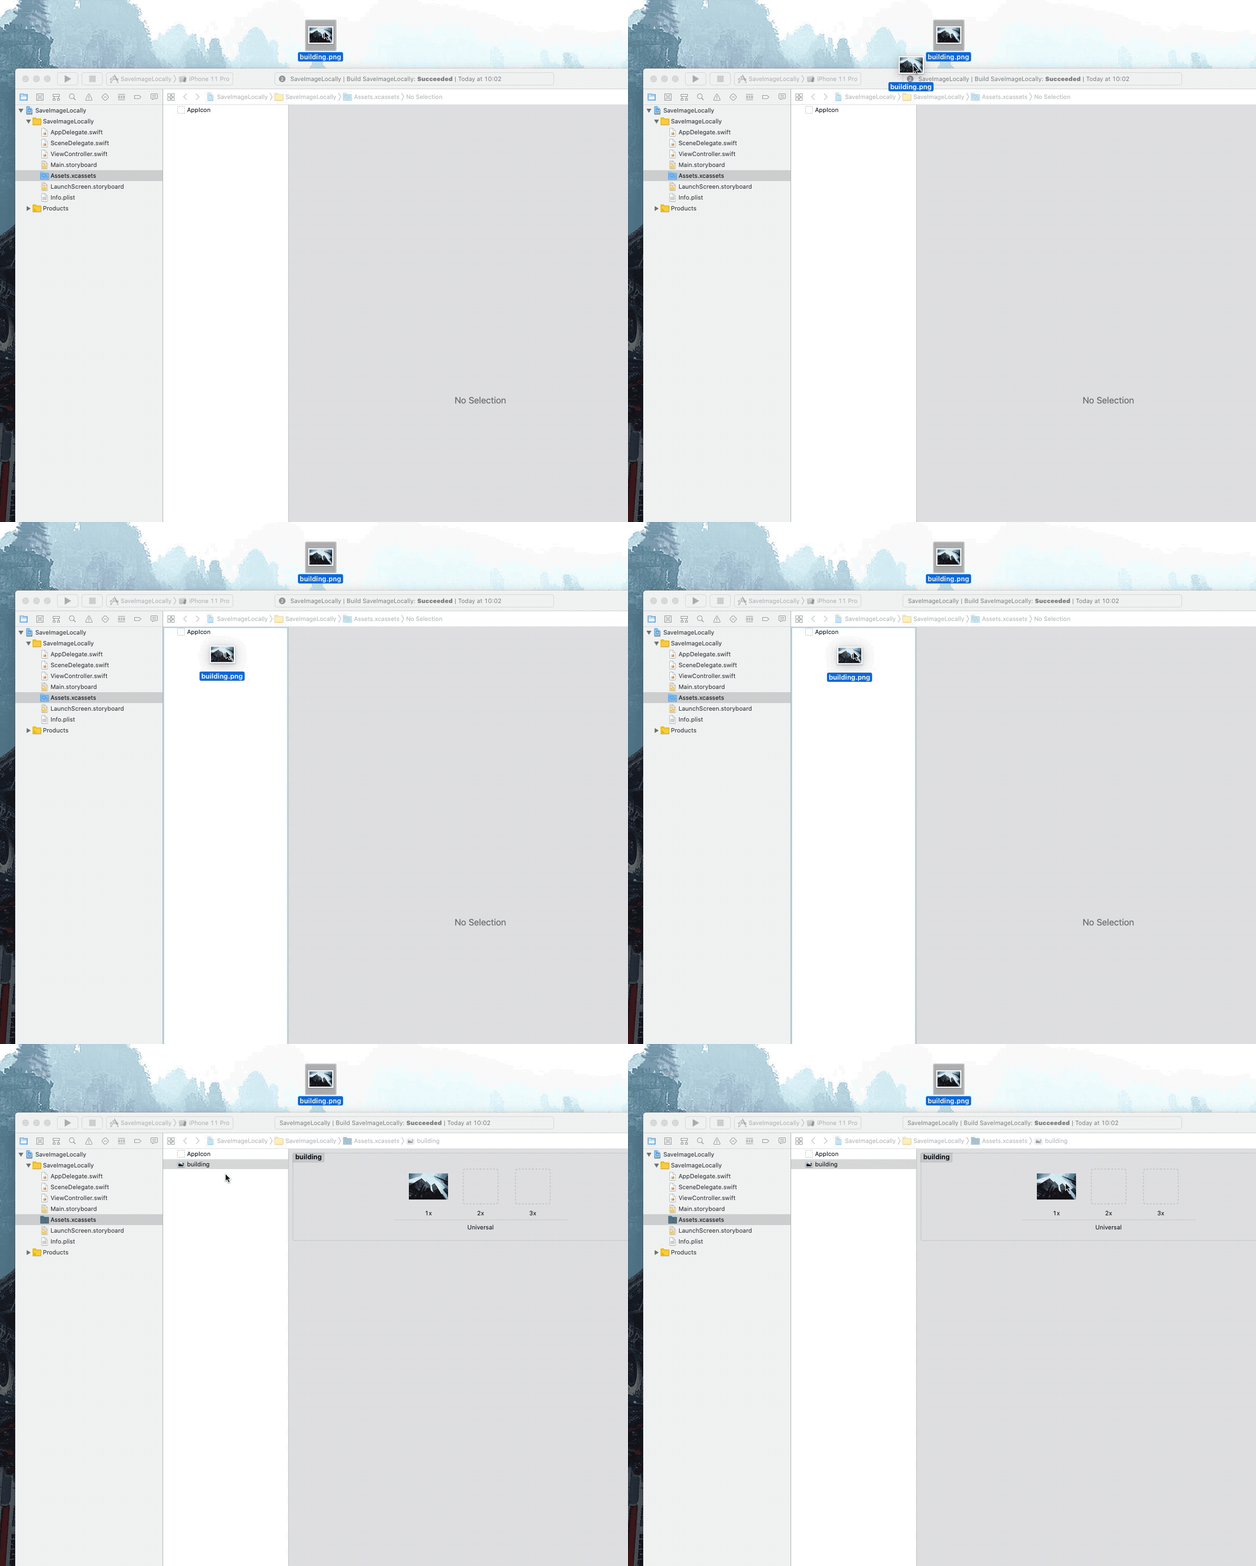
If we build and run the app now it will look like this:
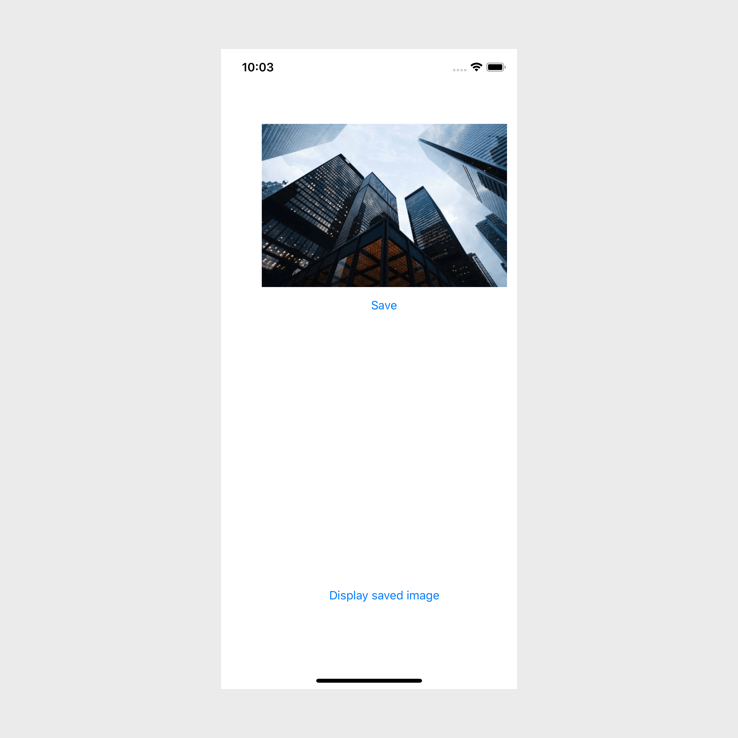
I know, it is not aligned, but this is only for test purposes. So If I tap Save and then tap Display saved image, it should work like the below image:
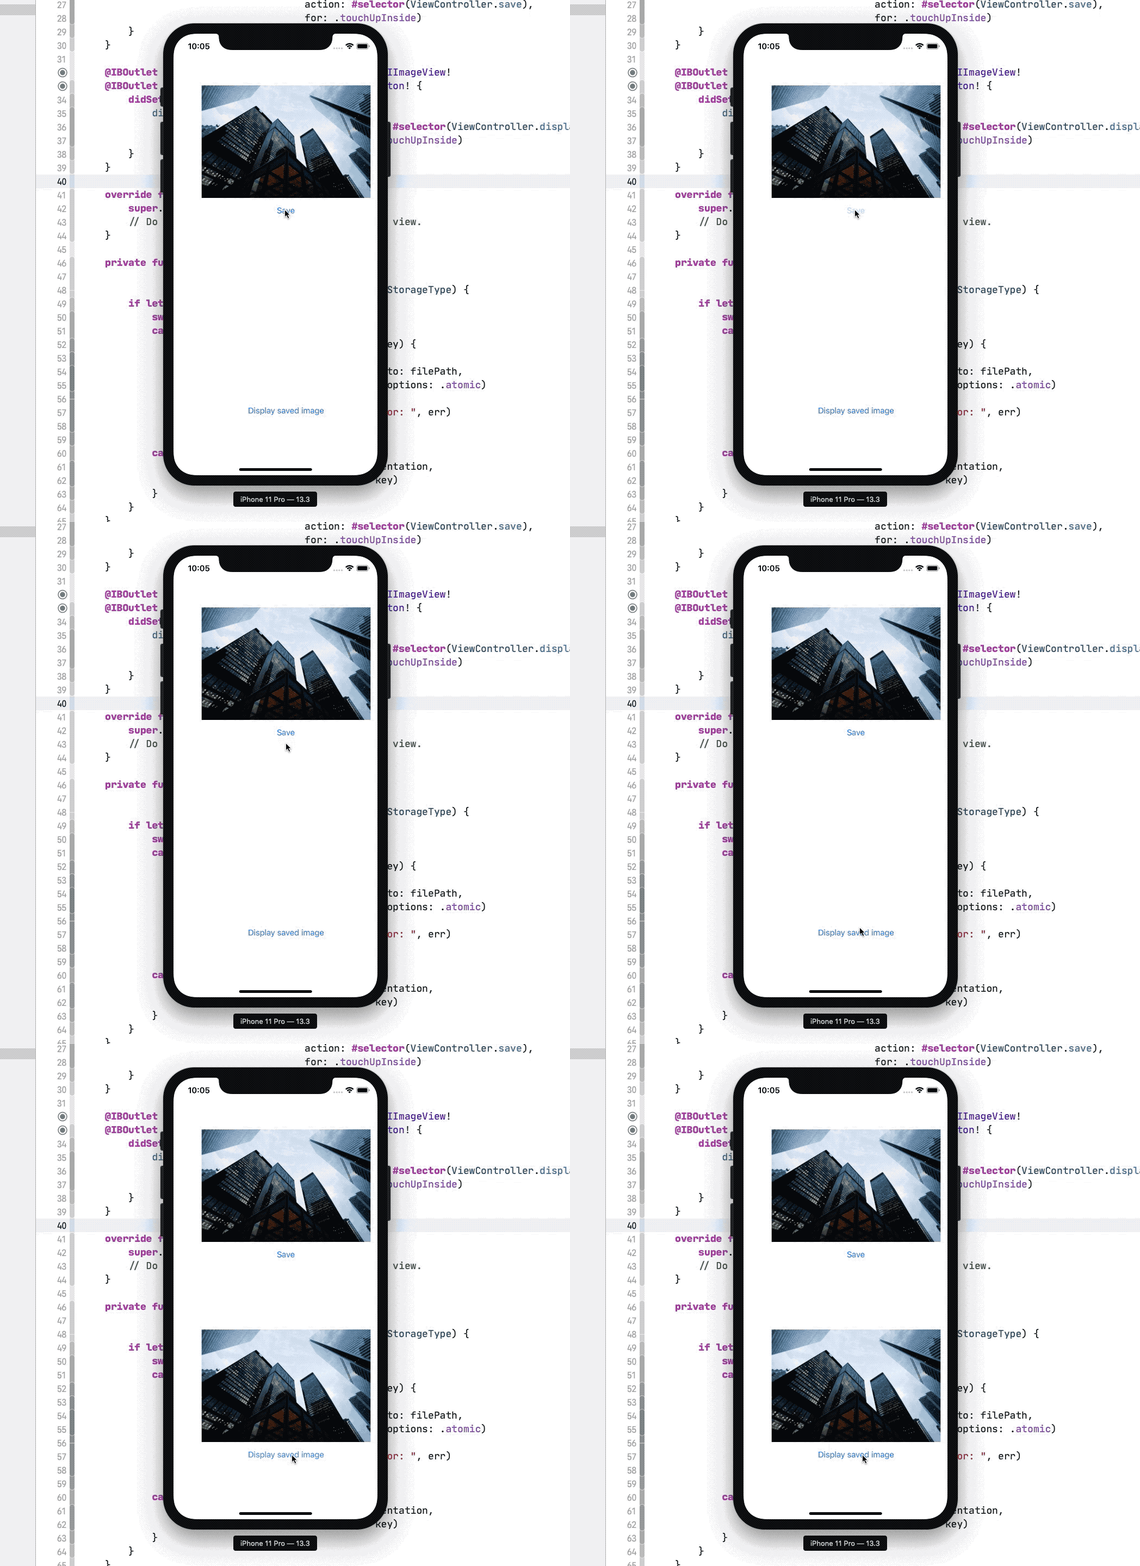
Awesome, we have a functioning app. You will need to update the save and display method depending on where you want to save an image using either .userDefaults as a storage type or .fileSystem as a storage type.
You can find the full source code here.
