Hide row/cells in Static UITableView with Swift

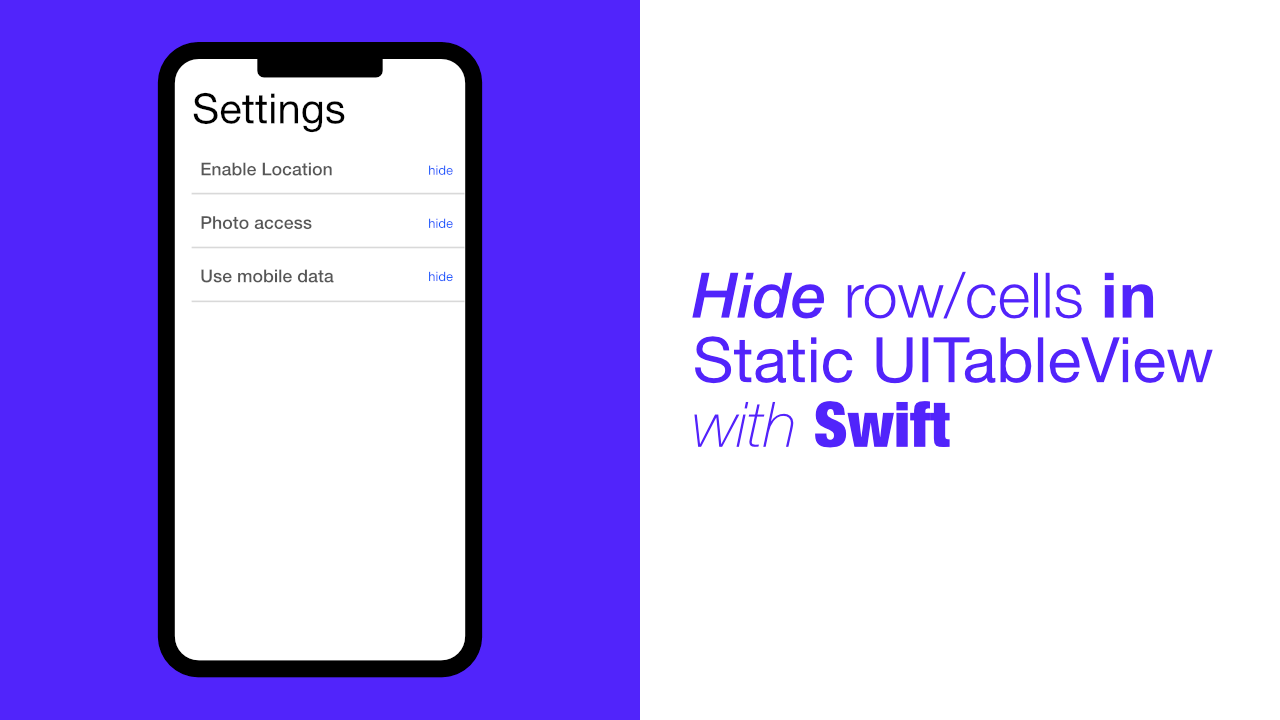
Static UITableView's have very specific use cases. Some of these use cases can be menu's or the settings of your app. These two examples would generally have static content, but that doesn't mean that they should not be able to change based on user input.
One such example could be when a user turns a setting on or off. This user interaction could allow for more options to be displayed, for eg, on your settings page you might have certain settings that will only be shown if the user has a premium account.
In this tutorial we will learn how to show and hide rows/cells in a static UITableView. I am going to do a basic setup of a static UITableView, if you want more information or want to know how use a custom cell in a static UITableView, you can take a look at this tutorial.
Step 1: Create static UITableView
If you already have a static tableview setup, you can skip to Step 2.
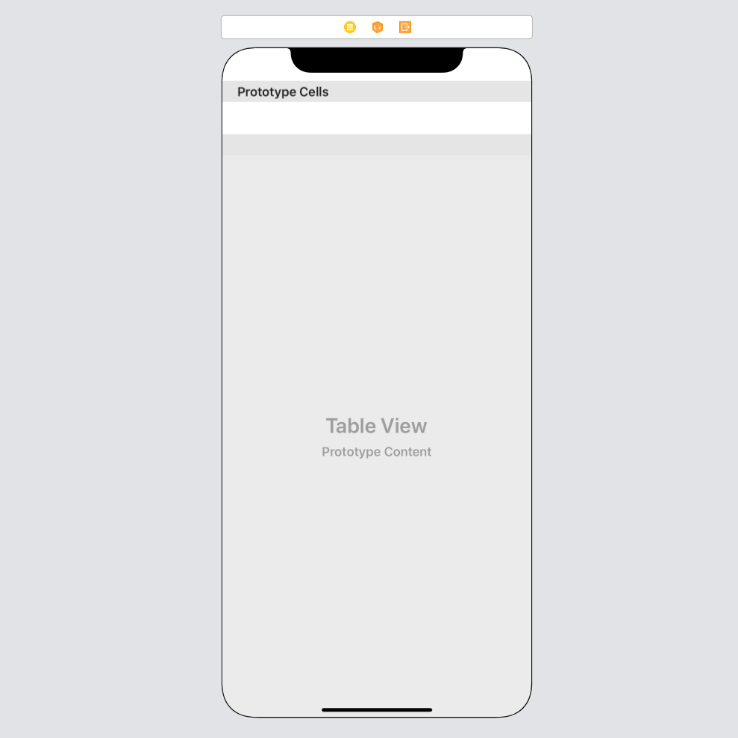
A static UITableView requires us to use a TableViewController. The first thing that we will do is to remove the current ViewController in our Interface Builder and replace it with a UITableViewController.
To do this, click on the ViewController in the structure area in Interface Builder, and then delete it:

Once we have this deleted we can add our TableViewController. Interface Builder should look like this once you have added in the TableViewController:
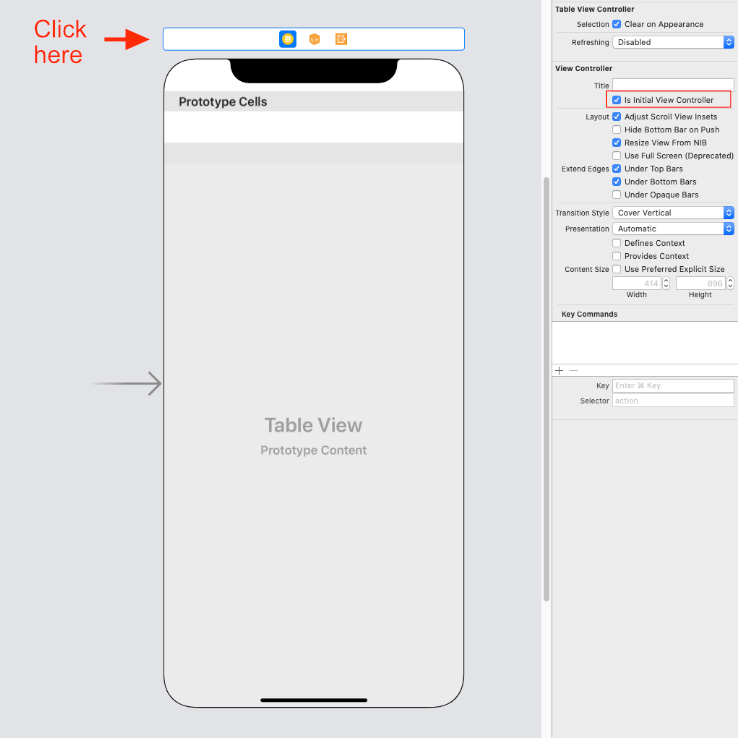
Now that we have added this, we need to set it as our initial view controller, to do that click on the bar above the TableViewController, and then in the Attributes Inspector check the Is Initial View Controller checkbox. See below image:
Now that we have done all of that, we need to make this TableViewController static, and then we need to update our ViewController class to inherit from UITableViewController instead of UIViewController. Once we have updated the inheritance, we can set the class for TableViewController using Interface Builder.
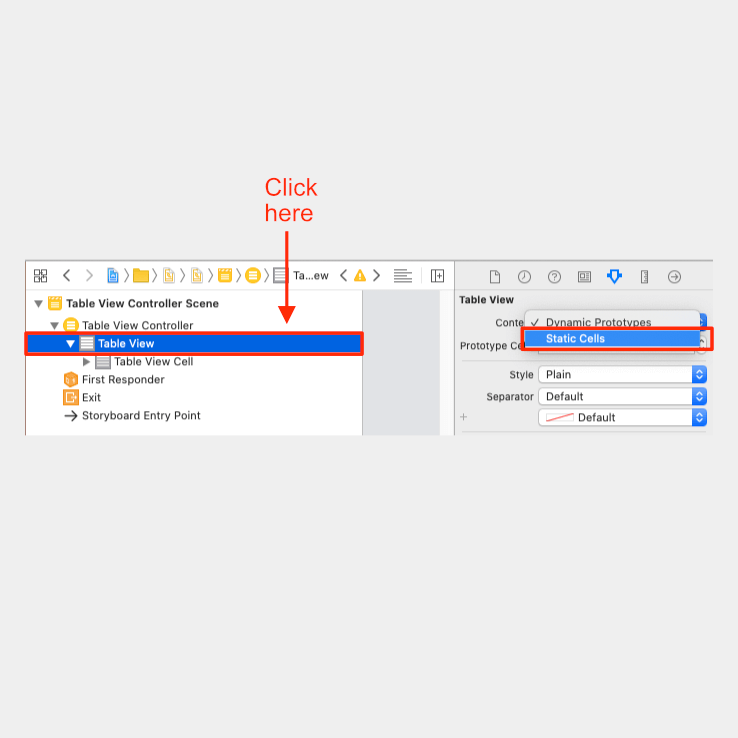
Change TableViewController to static. To do this, click on Table View in the Structure Area, then click on Attributes inspector and select Static Cells from the Content dropdown, as seen in the below image:
We can now update our ViewController to inherit from UITableViewController. Update your ViewController code to look like this:
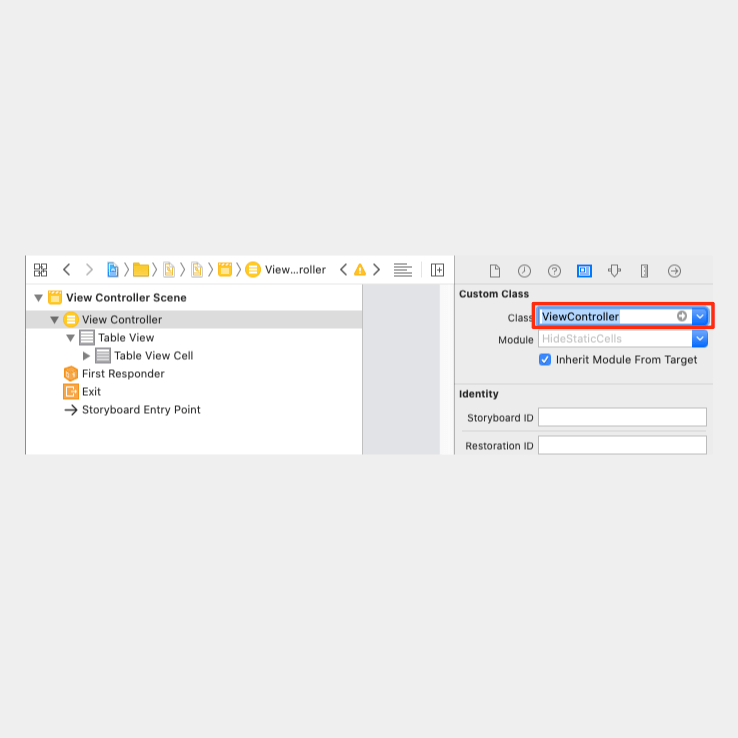
class ViewController: UITableViewControllerNext we need to use this ViewController and set it as the custom class for our TableViewController in Interface Builder. See images:
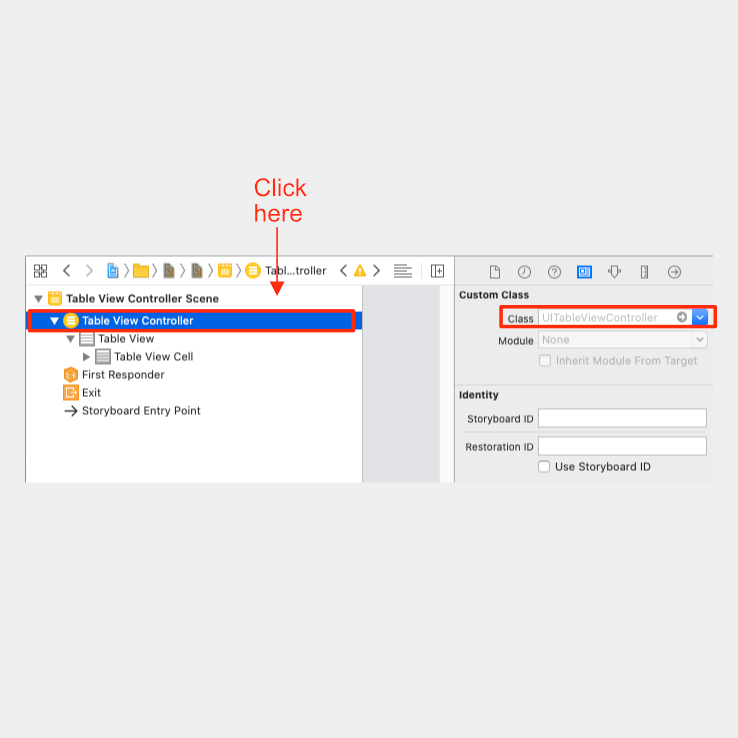
And then we can set the Class to ViewController:
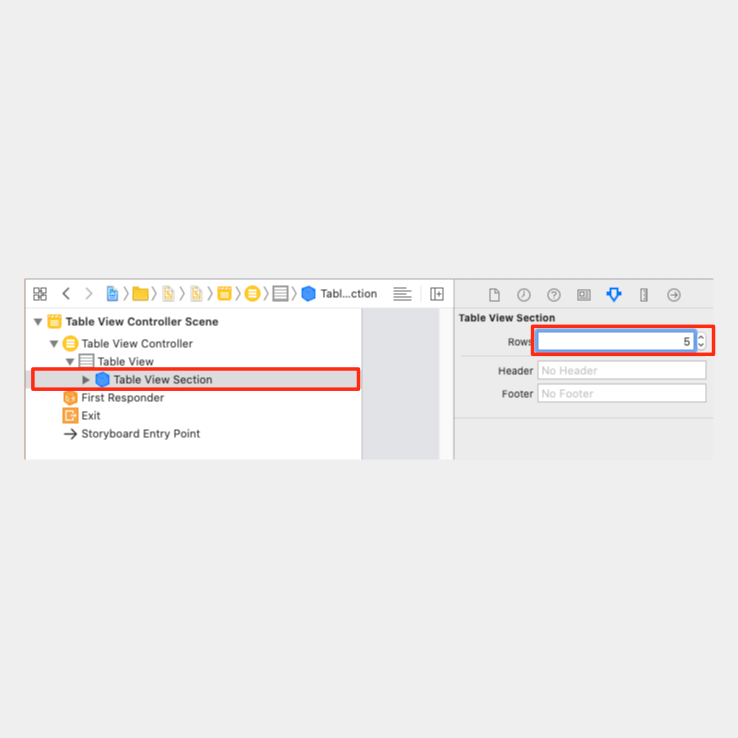
The next thing that we need to do is to add some more static cells. To do this, click on the Table View Section in the Structure area. In the Attributes inspector change the number of rows to 5. See image:
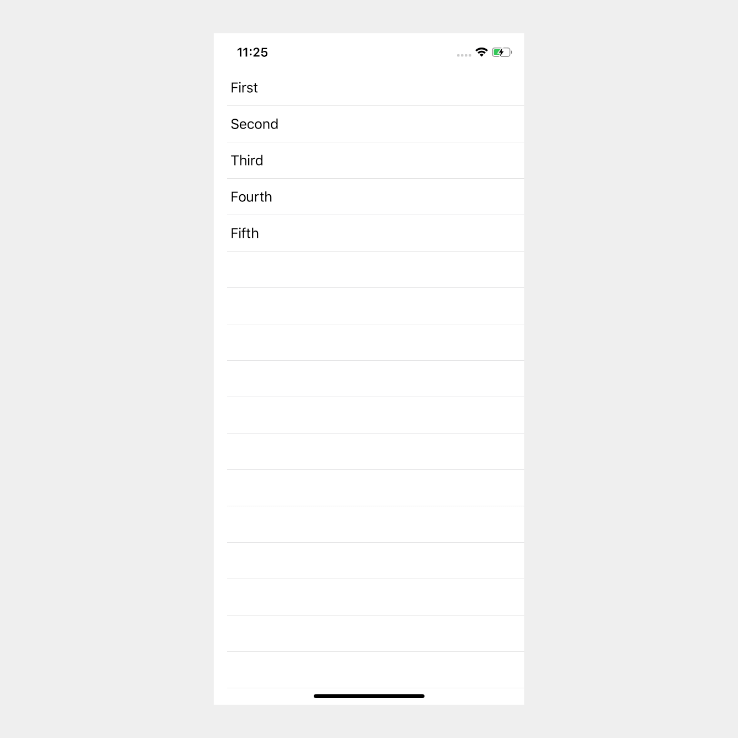
The final task for this is to add a label to each cell. Each label will have a different value, I will be using, First, Second, Third, Fourth, Fifth. See below image:
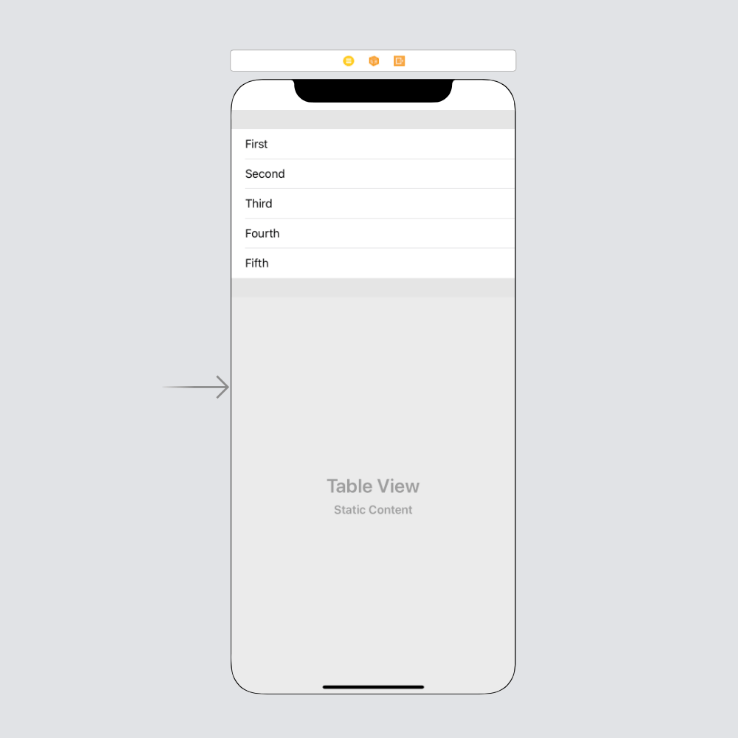
We can now build and run the app to make sure that everything is showing up correctly. If you build and run the app it should look like this:
Step 2: Hide the static row/cell
Hiding a row/cell is super simple. All we have to do is set the row/cell height. Luckily for us, UITableViewController already has this method built in.
Add the following code to your ViewController:
override func tableView(_ tableView: UITableView,
                        heightForRowAt indexPath: IndexPath) -> CGFloat {
    if indexPath.row == 2 {
        return 0
    }

    return tableView.rowHeight
}
For demonstration purposes I have just set the height where indexPath.row == 2 to 0.
If you build and run the app you will see that the cell where the label had Third as its text is hidden:
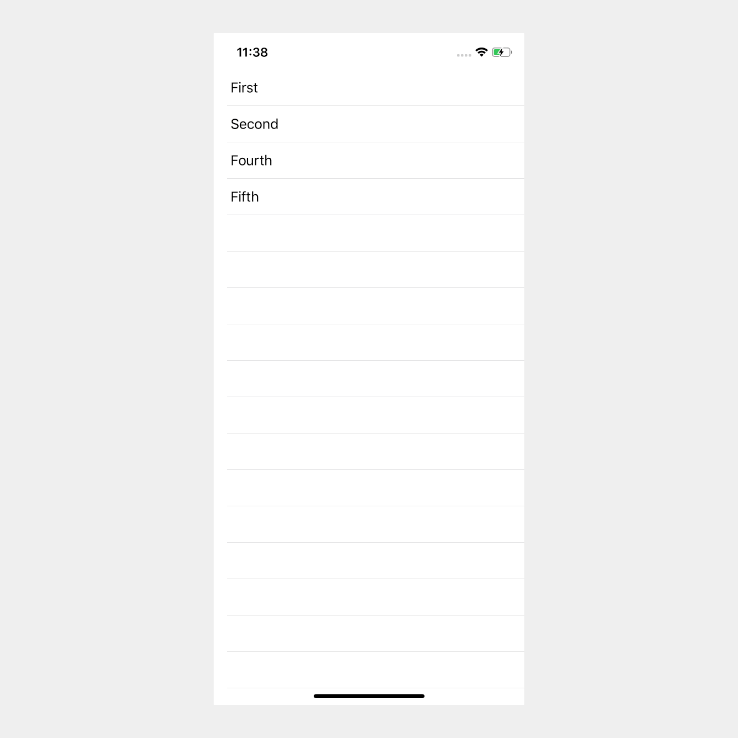
That is all that you need to do to hide a cell in a static table view. In the next step I will show you how to hide a row/cell when you tap on it.
Step 3: Hide tapped row/cell
In order to hide the row/cell that we tap on, we will need to store the index path. Lets add a new property to our ViewController called tappedIndexPath:
var tappedIndexPath: IndexPath?We can now add the didSelectRowAt method to our ViewController. This is another build in method that will allow us to do something when a cell is tapped.
In this example we will store the index path of the row/cell that gets tapped and we will reload the tableview.
Add the following code to your ViewController:
override func tableView(_ tableView: UITableView,
                        didSelectRowAt indexPath: IndexPath) {
    self.tappedIndexPath = indexPath
    self.tableView.reloadData()
}
The last part of this is to update our heightForRowAt method. Update the heightForRowAt method to look like the following:
override func tableView(_ tableView: UITableView,
                        heightForRowAt indexPath: IndexPath) -> CGFloat {
    if let selectedIndexPath = self.tappedIndexPath,
           indexPath.row == selectedIndexPath.row {
        return 0
    }

    return tableView.rowHeight
}
The if statement has been updated to unwrap the optional tappedIndexPath property and use the unwrapped value to assign a value to selectedIndexPath. We then use the row property from selectedIndexPath to hide the row that we tapped on.
Conclusion
Getting the static tableview is the most difficult part of this, once that is done, hiding and row/cell is really simple.
The full source code can be found here.